
Decoupage boards for the interior of the kitchen. Home decorator: decorating a kitchen board using decoupage technique. Cutting board decoration
I have wanted to do decoupage for a very long time. I studied various master classes and videos on this type of needlework. We are currently renovating the kitchen and have a lot of old utensils that can serve as interesting decor.
Since the time of my grandmother, three boards have been hanging in the kitchen, which have long lost their appearance and required either restoration or being sent to a landfill. So I decided to change them.
To get started, I needed to purchase varnish, acrylic paint, napkins and a flat brush. Everything else was in the house.
What we need:
- wooden plank (you can purchase a new blank)
- PVA glue
- flat and thin brush
- napkins for decoupage
- artistic varnish
- brown and white acrylic paint
- hand sanitizer or plain alcohol
- sponge, water, file, scissors
First you need to prepare the board. We process it with alcohol for degreasing. I didn't polish it, I decided to try it like this. Anyway, the idea was to make an aged kitchen item. 
Using a sponge, apply white paint with patting movements, first on the sides, and then on the entire surface. I didn’t process the working surface of the board, but what if it’s still needed not only for decoration. 
Let the paint dry. Craftswomen recommend waiting 12-24 hours. I did not wait long, because I really wanted to start the main stage.
We select fragments of a napkin, divide the napkin into three parts and take the top one with a pattern. We carefully cut off the necessary fragments and try them on the board. You can use only one fragment, I have two of them. 
Now the most interesting. You can immediately attach a napkin and stick with glue. But it is worth remembering that the napkin is stretched from moisture and can be easily damaged. Therefore, I used a different method. In my opinion, more acceptable for beginners.
We put a napkin face down on the file, pour a little water so that the drawing gets wet. We carefully (!) Remove air bubbles with a brush. Drain excess water and attach the drawing to the board. 
Again, we correct the drawing very carefully from the center to the edges, so that it is even and there are no bubbles. We take the file. 
Now you can apply glue with water (1: 1) with a brush from the center to the edges. After applying the glue, dry the work with a hairdryer or wait. 
Next, decorate the board to your taste. I applied brown paint with a sponge along the edges and a little on the surface to create an antique effect. 

After drying, varnish is applied. It is advisable to apply it 2-4 times. 
It turned out here is such a kitchen board with peppers. In principle, as for the first time, like nothing. Due to the fact that the board was previously covered with varnish and it peeled off, the craquelure effect came out without a special varnish. 
Creativity is an impulse of the soul, its manifestation in the best colors and, most importantly, the opportunity to use your talents to good use. For example, decoupage of cutting boards for the kitchen with napkins is now very popular. The topic of decoupage is so extensive that you can simply discuss it ad infinitum.
If you explore the technology of decoupage painting on your own, you can create incredible products with your own hands that can decorate a house or become an original gift for loved ones. If we consider the decoupage of the board step by step, then we can see by personal example that the technology, in principle, is not as complicated as it might seem at first glance.
Technology:
- The surface of the board is sanded;
- Impregnation with a primer is carried out;
- White acrylic paint is applied;
- Drawing is applied;
- Lacquering is carried out;
- Each layer of applied and dried varnish is sanded.
Advice for beginners. Do not rush to decoupage the boards, you need to look at examples of work, study the master class below, and only after that start doing the work yourself.
For the first time, say, for the period of studying decoupage, it is worth preparing:
- Glue, which is suitable for special, but PVA can also be used, however, over time, it turns yellow;
- Acrylic water-based varnish, which can be purchased at any store selling building and finishing materials;
- White acrylic paint;
- Artistic acrylic paints;
- Napkins, which can be ordinary household or specially selected because of the original pattern;
- Sandpaper of small and large fractions.
How to decoupage a cutting board step by step: photos and examples
Basically, decoupage of kitchen boards is carried out, both old and new. It is wood that is considered a particularly pliable material, which is pleasant and comfortable to work with. The design of the cutting board can be a completely different ornament, even a map of the world, or it can be an icon, chess pieces, and the like. Now, on the eve of the New Year holidays, there is a great demand for boards designed in the direction of this theme.

In general, it is worth learning such processes for creating decoupage as:
- Surface sanding;
- Soil grinding;
- Sticking a picture from a napkin onto a board.
If in the future it is planned to use the board, then it should be covered with a particularly durable and waterproof varnish. It is advisable to choose parquet for floorboards or yacht, they are the most durable and have excellent characteristics.
If the product is decorative, then one layer and the use of acrylic varnish is enough.
By bringing your ideas to life, you will be able to discover not only a lot of talents in yourself, but also an unreal ability to create a miracle, to give your family gifts handmade, which are much closer and more pleasant to the heart than purchases made in a store.
Decoupage boards with napkins
Making decoupage using pictures from napkins is not easy, but possible.

The effect of the product will not be long in coming.
- You need to pick up a napkin on which the desired pattern will be. It should be thin, like a veil, so that you can easily transfer the picture to the board. In this case, the canvas with the image of an apple will be considered.
- To create chic means to feel every moment of the creation process as carefully as possible. That is why, to cut out the picture, it is worth using small and neat manicure scissors.
- The place where the apples will be located on the board must be carefully primed. To do this, you need to circle the stencil of the picture with a pencil, and fill the coating with a primer inside the contour. After that, while the primer dries, you need to separate the lower, unnecessary layers from the napkin. The material should be as thin as possible.
- Through the use of acrylic primer and a brush, a primer is applied. Some use foam rubber sponges to apply, but if the drawing is small, then it is better to take a brush.
- When the soil begins to just dry out, you can stick a napkin. To do this, dilute the glue with a small amount of water. Gluing is carried out from the top of the napkin. The adhesive composition is applied little by little with a brush. In the same way, the napkin is applied to the board neatly and in small parts. The formation of folds and bubbles is categorically excluded, which will not only spoil the appearance of the product, but also the durability of decoupage.
- If, nevertheless, defects have formed, then you can get rid of them with the help of an ordinary spoon. Even without much experience, anyone who wants to make the perfect surprise can carry out the removal of defects.
- Once the previous process is completed, acrylic varnish can be applied. For this you can use foam rubber.
After the first layer has dried, you can decorate the outline of the board. In this case, different scales or waves will be created, to whom, as you can see better. It is worth noting that only the contour of the scales is created, since their inner space should be empty. Inside they can be filled with craquelure or gilded paint. Either one will look perfect.
Be sure to highlight the contours of the apple with acrylic paints to make them clear and bright.
For the design of the contours, mother-of-pearl paint with a yellow tint is suitable. Thus, the effect of pouring on apples is created, and they seem to be real. Next, another layer of varnish is applied, and the product is left to dry completely.
What is required to create a competent and beautiful decoupage board
Previously, decoupage was considered the art of the poor, just like cheese balls, which were literally made from improvised materials.

In general, why this type of creativity is called budget:
- It does not require you to study or attend courses.
- An ordinary plank can be used as a basis.
- No need to purchase expensive materials.
Similarly, decoupage is considered a cheap craft. To create pictures and compositions, you can use what is in household use, in particular, napkins, boards, paints and more.
It is worth noting that decoupage can be performed not only on a wooden cutting board, but also on the surface of interior items, an album, a plate, ceramic dishes, as well as on mirrors, notebooks and similar products.
Decoupage boards for the kitchen without problems
There will be no problems with finding pictures at all, because there are an incredible number of sources. For example, newspapers, magazines, books, napkins and even ordinary wrapping paper, including fabric, lace.
In order to cut out the pattern, you can use stationery knives and razor blades.

In order to smooth the pattern, you can use small rollers, spoons and even a rolling pin. It is strictly forbidden to leave excess glue, as they will turn yellow and ruin the look of the picture. To remove, you can use paper, cloth, sponge and even a brush. As a decoupage coating, polyurethane varnish, acrylic aerosols, yacht and the like are used.
If you talk even more briefly about decoupage, then this:
- The opportunity to express yourself, your individual style;
- An option to make your home more attractive, stylish and original;
- The opportunity to become an artist without attending courses and a special school;
- Creativity that does not require investment;
- A business that can be done at home and in any convenient and comfortable place;
- The ability to make an original gift from an ordinary cutting board;
- A case suitable for all ages;
- The ability to use different materials for drawing a picture.
Decoupage cutting board (video)
Just imagine, there is an opportunity to create a masterpiece with your own hands, a copy of which will not be in any corner of the entire planet.
Decoupage for schoolchildren. Master Class
The structure of the introductory lesson in the system of additional education MBOUDOD DDT of the village of Yaroslavskaya Mostovsky district of the Krasnodar Territory. This material is intended for students of middle and high school age.
Stepanchuk Olga Alexandrovna teacher of additional education MBOUDOD DDT of the village of Yaroslavskaya Mostovsky district of the Krasnodar Territory
Decoupage has a very rich and interesting history. Decoupage is not associated with any particular country or time, decoupage takes its origins from various styles and many countries. Already in the 12th century in China, peasants made cutouts from bright colored paper to later decorate windows, lanterns, gift boxes and others, so to speak. everyday things.
Some argue that decoupage came to China from Siberian nomads who decorated objects in tombs with carved felt figures and compositions. At the same time, German and Polish artisans have also been using paper cutouts for decoration for several centuries. Polish women and children developed especially well the skills of working with colored paper.
The word decoupage comes from the French "cut". Accordingly, the “decoupage technique” is a technique for decorating, decorating with the help of cut paper motifs. The decoration of interior elements using the “decoupage” technique dates back to the 17th century. It was then that gluing paper applications on furniture, floors, walls was widely used, so that varnished applications looked like drawings.
Currently, motifs are more often cut out of three-layer napkins, therefore decoupage in some languages has received a different name - napkin technique. But sticky motifs are not limited to napkins.
These can be illustrations from magazines, wrapping paper, labels. Recently, the use of printer printouts has become widespread. And, in fact, the only unifying base in this technique: cutting motifs. The decorated surfaces themselves can be made of a wide variety of materials - wood, metal, ceramics, glass, fabric, leather, plastic.
Today, decoupage is experiencing an active revival around the world in America, South Africa, Australia, England and Japan, including in Russia, decoupage has been constantly gaining momentum and becoming popular over the past few years. After all, decoupage is truly interesting and, moreover, practical!
Actual: The introduction of this technique contains an element of creativity and novelty. The technology for making a souvenir is quite simple and at the same time includes training in some necessary labor operations and develops constructive thinking in adolescents.
Decoupage technique is relevant for both middle and older students.
Today, in the crazy rhythm of modern life, you just want to stop and make the world around you bright and colorful.
Decoupage gives a chance to perfectly diversify the interior of your own home and breathe new life into objects that are far from new. Since with the help of this technique you can decorate a variety of things: caskets, vases, kitchen utensils, photo frames. Any thing created with your own hands, decoupage creations will be a wonderful gift on the occasion of the celebration.
Decoupage using napkins when working with school students is good because this technique does not require the ability to draw professionally, develops the imagination of children, fine motor skills, and corrects color perception.
Purpose of the lesson: production of a product in the technique of direct artistic decoupage on wood.
Lesson objectives:
Tutorials: to expand the horizons of students in the process of studying this type of applied art, to form knowledge about the existing types of applied art, about the features of their implementation
Educators: creating a working, friendly atmosphere in the classroom.
Didactic: the ability to implement the acquired knowledge in practical application.
Developing:
to develop the aesthetic taste and creative abilities of students in the design of work;
development of imaginative thinking, artistic taste.
disclosure of creative potential, independence, formation and professional self-determination.
Lesson type - master class.
Conduct method: Explanations with elements of showing work methods, safety rules.
Equipment and training equipment:
Exhibition of finished works; samples of materials and tools;
multimedia projector; screen.
Materials for the practical part of the lesson:
object for decoration;
napkins with pictures for cutting or tearing out; acrylic PVA glue;
brushes;
sponge;
various acrylic varnishes and paints.
Forms of work: master class, computer presentation, group work, individual work.
Lesson progress:
№1 Organizational stage.
№2 Theoretical stage of the lesson. №3 Practical part of the lesson.
No. 4 The final stage.
Teacher's work:
No. 1 Setting the goal of the lesson and explaining the tasks, TB.
No. 2 Working with a multimedia projector, lecture, instructions for working with various materials (Presentation) No. 3 Master class (step-by-step plan for decorating a cutting board). №4 Presentation of decorated products.
Student work:#1 Preparing for the event on the ground. #2 Listen carefully. No. 3 Phased practical work to create a product. No. 4 Self-analysis, self-assessment of the product and work in the classroom. Evaluation of the work of comrades.
Time:
#1 5 min.
#2 15 min.
#3 65 min.
#4 5 min.
This is where our lesson ended. It remains to show the result of the work friend
friend.
Summary of the master class.
Times are changing, fashion is changing, but still handmade products will always bring joy to the creators and the people around them.
I wish success to everyone who wants to try his hand at decoupage. After all, decoupage allows not only to create unique author's works, but also to give a second life to things that have served their time.
Cutting board decorating step by step
We will need:

* cutting board (blank)
*acrylic primer
*three-layer napkin
* glue for decoupage or PVA
*medium width brush (soft)
*acrylic paints
* lacquer
*sponge
First stage:
primed the decorated element, in 2 layers of primer with intermediate drying
Any creative process is always fascinating in itself. If you want to create a unique decorative item for your home with your own hands or make a gift for a loved one, then a beautiful decoupage of a wooden cutting board will be the most suitable option.
Materials for decoupage boards
Using decoupage technique, it is possible to create truly unique things that will be distinguished by their individuality and originality. When answering the question of how to make decoupage boards with your own hands, you should first mention all the necessary materials for this process.


Any novice master should purchase a set of tools in the form of:
- the wooden board itself (by the way, you can use a used item that will become new after registration);
- glue: both special decoupage glue and ordinary PVA are selected (minus PVA is the yellowness that appears over time);
- acrylic water-based varnish - sold in stores building and finishing materials. If the board is decorative, any lacquer is suitable, if in the future it is used in everyday life, it is worth choosing a yacht or parquet type of lacquer that has improved performance properties;
- acrylic snow-white paint;
- acrylic paints for artistic painting of different colors;
- napkins or any images you like (magazine clippings, printed pictures, etc.);
- scissors, brushes, sponges, sandpaper.

Stages of creating a decoupage cutting board
Thanks to a detailed decoupage master class, the process of creating a unique beautiful board for the kitchen will not become something complicated. All work will take about 2-3 days. Working with wood is pleasant and convenient.

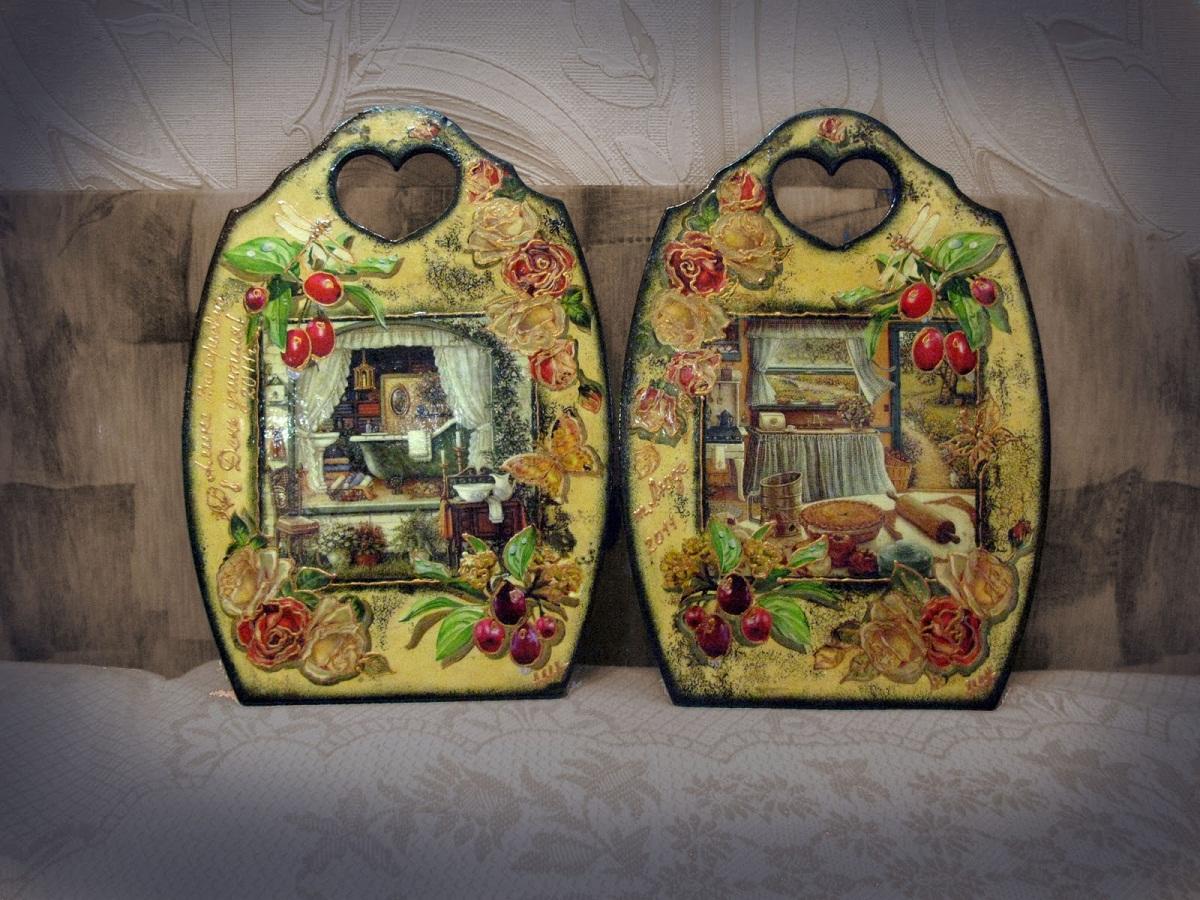
As a picture for a board, you can use themed drawings in the form of vegetables, fruits, dishes, or choose original unusual images: a world map, a chessboard, a newspaper page, etc.


Step-by-step decoupage for beginners includes several main steps:
- Sanding the workpiece.
- Ground surface grinding.
- Pasting the image on the board.
- Product varnishing.

Decoupage the board with napkins
Following the instructions for decoupage of a cutting board, you will be able to get a high-quality original piece of furniture. For decoupage, you can choose any multilayer napkins. Only the top thin layer should be transferred to the board.

So, the decoupage process begins with the preparation of the board. An even wooden product is covered with the first layer of acrylic paint with a brush along the fibers. If during the process the wood fibers begin to separate from moisture, then after drying they must be sanded.


After the first layer has dried, a second one is applied, but with a sponge, so that no streaks are visible. Again, everything dries well. To speed up the process, you can connect a hot air dryer.

When the product is completely dry (about 24 hours), you can proceed to the imposition of a fragment of a napkin with a pattern. Before this, the desired pattern should be carefully torn out of the napkin. You can transfer the napkin to the surface of the board in several ways (wet, dry), the main thing is that there are no wrinkles and air bubbles.

For beginners, the dry method is suitable: the prepared fragment is applied to the board and, using a brush dipped in an adhesive solution, begins to gently stick. In this case, you should not rush, so as not to tear the napkin.

If the folds are still formed, then you can smooth them out with an ordinary spoon or a rubberized roller. After removing all wrinkles and bubbles, you can leave the product to dry.

After the workpiece has dried, it is time to draw the contours of the image. Also, using colored acrylic paints and a sponge, you can create blurry edges. To do this, with wet movements, the paint is applied with a sponge to the right places.


The “splash” on the surface looks very impressive, as in the photo of the decoupage of the cutting board. To create such an effect, an ordinary toothbrush is dipped in the paint of the desired shade and, after running a finger over it, the droplets scatter over the surface.

As soon as the paint dries, the process of varnishing the product begins. The selected varnish is applied to the entire surface of the board in several layers, while each of them must dry well. Now the cutting board is completely ready for use as a full-fledged kitchen item.

Decoupage is considered a very budget type of creativity. It is possible to purchase all the necessary materials and tools in specialized needlework departments, in ordinary hardware stores, and in online purchases. The main thing is to love your work and enjoy the creative process.

Photo of decoupage cutting board


 We select the side on which the decor will be located and apply one layer of white primer to this side of the board. Dry and sandpaper. As a decoration, we need a motif of a suitable napkin, which we carefully cut out with scissors along the contour. Then we stratify the napkin (we take only 1 layer out of 3) and apply it to the board. Be sure to have the same distance from the side edges of the napkin to the edges of the board. There should be a little more distance below than on the side. And above the distance should be even greater than below.
 I have a mushroom motif. I had to cut it with small nail scissors, but it's worth it.

 Having cut the motif along the contour, I glue it on PVA glue, pressing it with a flat brush from the center of the motif to the edges, removing excess glue and air. Land. For protection, I apply one layer of acrylic varnish. I remove the extra wrinkles with sandpaper (if any).
 We paint the board with small strokes with a small brush in different directions. In this way, we go around all the small details, then with a larger brush we cover the entire board with orange.

 We carry out the application of color in two layers with intermediate drying.

 Now we create a volumetric background with acrylic paints, which is called "acrylic fur coat". To do this, we take an old paint and with a palette knife or a thick brush we lay it out in a dense layer on the board, making the surface embossed. If there is no old paint, the paint can be thickened: putty, flour, semolina, or hold the paint a little in the air. I thickened the paint with flour. At some point, when the relief paint has dried up, you need to check that sharp tips of the paint do not form, press them with your finger and remove them until the paint is completely dry.