
How to make a beautiful mug with your own hands. An inexpensive but valuable gift: we decorate a mug with our own hands. Dot painting of glasses and mugs
Polymer clay was invented relatively recently. Masters have known about this material for no more than half a century. Today, sculpting from it is a very popular hobby for amateurs and a professional activity for experienced designers.
Buying polymer clay a couple of years ago was very problematic. Residents of various Russian cities ordered it from the capital or from other countries. Now, almost all art salons or needlework stores offer such plasticity, where it lies next to knitting yarn, paints and floss that are familiar to us. Many interesting crafts can be made from this amazing material. These are not only souvenirs, but also a huge number of other things that will decorate our lives. You can also decorate the mug with polymer clay, the master class of which is described in this article.
Principle of operation
Today, polymer clay is one of the most common materials used for needlework. Masters are attracted by its elasticity and non-toxicity. In addition, crafts obtained from such material look simply fantastic.
You decide to decorate mugs. Then you should learn how to work with this material. Half the success of your event will depend on choosing the right polymer. It should be borne in mind that ordinary self-hardening clay can be used to decorate mugs and other dishes. However, this material hardens in air after a certain time, which is not enough for beginners, in order to give the product the necessary shape.
What is the best thing to buy in order to decorate a mug with polymer clay? The material can be of any kind. The main thing is to study the instructions and learn the rules for handling it.
polymer clay brands
Today, art salons and needlework stores offer their customers many varieties of material. Which one to buy to decorate the mug with polymer clay? Consider the brands of this material in more detail:
- The domestic manufacturer offers St. Petersburg plastic under the name "Tsvetik". This is the cheapest option, but working with it is somewhat difficult. Products of the brand "Tsvetik" are quite solid and easily soiled. However, a person who has patience and skill can make beautiful things out of them.
- In order to decorate the mug with polymer clay, you can buy the material of the German manufacturer Cernit. For some, it may seem, on the contrary, too soft in work. However, many craftsmen are attracted by the quality and color range of this sculpture.
- The Fimo brand is the most popular in our country. It is produced by the German company Eberhard Fabe. There are several varieties of this polymer. So, "Fimo Classic" is more solid. The Fimo Soft brand is soft and easy to knead. Both types of material are available in a wide range of colors. The manufacturer offers polymer clay with sparkles, transparent, and also luminous in ultraviolet. All these types are perfect for those who decide to decorate the mug with polymer clay.
- Some craftsmen use material brought from America. This is polymer clay of two brands - "Kato" and "Scalpi". It is not offered in Russian stores, but those who were able to purchase it need to be prepared for a fairly strong smell of the material, similar to the smell of Soviet gouache. In terms of its other qualities, this polymer is similar to other brands.
- The whole polymer line is offered by Poliform Products. But this material is chosen, as a rule, by sculptors.
In addition to solid, all of the above companies produce liquid plastic, which is a gel. This is a viscous transparent material that hardens after heat treatment. Decorating mugs and spoons with polymer clay can also be done using a gel, the possibilities of which are also endless.

Before you buy this amazing material, you should choose a product that will be decorated. Based on its color, you will need to decide on the tone of the plastic. Let's start with two or three. Among them should be a white bar, which can be diluted with more saturated colors.
varnish
If you are decorating a mug with polymer clay, how to make the finished item the most attractive? To do this, it should be varnished. This will give the mug a gloss and more expressiveness of the colors. In addition, varnish is necessary to enhance the strength of things. In addition, he fixes tinting paint on it.
What are plastic clay varnishes? The manufacturer offers matte, semi-gloss and glossy coating material. Such varnishes are sold in hardware stores. What can be done to make a polymer clay mug look the most attractive? Experienced craftsmen advise purchasing acrylic water-soluble varnishes with a polyurethane base. Such material is practically odorless, dries quickly and is easily washed off the brush. In a day, a mug with a polymer clay decor, covered with a similar varnish, will become resistant to mechanical damage and moisture.
Those who are engaged in such work for the first time should remember that before applying varnish, the surface should be washed with dishwashing detergent or degreased with alcohol, and the coating process itself is best done with a synthetic brush.
Working surface
How to prepare for sculpting with polymer clay? To work with this material, you need the smoothest possible surface. It can be glass or ceramic tiles, as well as a simple sheet of white paper. The main condition for such a surface is the absence of pores into which plastic can eat.
Knives
A block of polymer clay should be cut into pieces of the required size. For this, the master who decorates the mug with polymer clay (see photo below) will need knives.

They must be sharp enough. This will prevent deformation of the product during cutting. To complete the decor of the mug, a regular or blade can be used.
Rolling pins and stacks
These tools do not have to be purchased in art salons. Stacks when working with plastic can be knitting needles or toothpicks.
In order to roll out plastic, many lovers take a glass bottle. Suitable for these purposes and other material at hand, which may be, for example, a bottle of hairspray or deodorant.
Gloves
After heat treatment of polymer clay, the master's fingerprints may remain on it. In order for the product to be neat and not to spend too much time polishing it, it is necessary to wear latex gloves. You can buy them at any pharmacy. Sometimes they are not very convenient when sculpting, but they greatly increase the quality of the work done.
Gloves should be selected according to the size of the hand. After all, the denser the latex adheres to the fingers, the more convenient it is for the master to decorate the mug.
Other
What other materials will be needed to complete the planned work? In general, in order to make a thermoplastic thing, you can use:
- special forms (boats), with the help of which figures are easily cut out;
- a special syringe (extruder) equipped with various nozzles;
- pasta machine;
- texture sheets;
- powders, etc.

However, all this can be bought after you understand that sculpting products from polymer clay is your calling.
What a Newbie Needs
As a rule, they decorate mugs with polymer clay of a girl. A master class on carrying out such work begins with an explanation of what beginners in this business should prepare:
- the mug itself;
- nail polish remover or glass cleaner;
- polymer baked clay;
- wooden skewer or toothpick;
- clean wet cloth;
- epoxy adhesive;
- stationery knife;
- varnish for plastic clay.
Preparatory stage
So, you have decided to decorate the mug with polymer clay. How to do this work with your own hands? To begin with, you should take some boring mug, which should become bright and original.

It should be laid on the surface in such a way that it is as convenient as possible to work. For this, for example, a baby blanket can be used.
Beginning of work
If your idea is to decorate a mug with polymer clay, how to make this work? To begin with, a piece of plastic of the desired size is cut off. Next, it should be well kneaded. Only in this case, the clay will become soft and plastic. To improve the working properties of the material, you can use a special tool. It's called a plasticizer. Experienced needlewomen are advised to purchase Moldmaker brand products. A few peas of this product are enough to soften a whole pack of clay. Vaseline or creams can serve as alternative materials. Suitable for softening and warming procedure.
It happens that clay, especially fresh clay, sticks very strongly to hands. In such cases, experienced craftsmen mix it with a harder brand or leave it on a piece of paper for several hours. However, it should be borne in mind that all the above manipulations will not help the material into which the paint has already got.
It is very important that no air bubbles remain in the clay. In the future, this will ruin your product. When heated, the air will expand, which will warp the plastic.
After that, you should take a cotton swab and, moistening it with nail polish remover or glass cleaner, wipe the surface of the mug. After that, we make an application on it.
baking
A mug with a polymer clay application should not be afraid of water, fade and lose its original appearance over time. To preserve all these qualities, the product must undergo heat treatment. What device is suitable for this? For baking polymer clay, use a gas or electric oven, as well as an electric mini-oven. Microwaves are not suitable for this purpose. The hardening process of polymer clay occurs only when exposed to high temperature. The principle of heating food in the microwave is to create waves. However, there are exceptions to the rule here as well. Some models of modern microwaves are equipped with a function that allows you to set the desired baking temperature. If there is such an opportunity, then clay can be placed in this household appliance.
What else should be considered when decorating a mug with polymer clay? MK (master class) involves accurate monitoring of the temperature indicated on the clay packaging. Exceeding it will cause the material to burn and release toxic substances. As a rule, this temperature is in the range from 110 to 130 degrees. That is why it will be very convenient for the master if the oven he uses has a built-in thermometer. Clay is baked for a short time. Duration of hardening applied to the mug application - ten minutes.
End of process
After heat treatment, the mug should be removed from the oven. From it you need to carefully separate the baked application. Next we need epoxy glue. It is made independently, adhering to all the requirements of the instructions. A thin layer of glue should be applied to the reverse side of the completed application, as well as to the mug, which we wipe again with nail polish remover or glass cleaner. After that, the appliqué is pressed tightly against the mug and subsequently adheres to it very well.

At the next stage of work, you will need a matte or glossy varnish. They cover the finished application. The varnish will protect the surface of the product from damage.
How does the application behave in operation? A cup made in this way can be safely washed. But do not put it in the dishwasher or use abrasive products on the decor.
You don't like boring white cups and would you like to decorate them? It is quite possible, and we will definitely help you with this. There are many different methods on how to beautifully decorate a cup for yourself and your family. The best gift is the one made with your own hands, where the soul and the warmest feelings were invested. Therefore, if you have to congratulate someone, do not miss this option. Making an inscription on a mug with your own hands is not so difficult as it seems at first glance, but you need to take into account some of the nuances that we will discuss later. In this article, we will share various ways, and you can apply any pattern on the surface of the cup without any problems.
We make drawings on glass - we paint glasses with our own hands
How to paint patterns on cups? Having tried to paint a glass on your own once, you will be so carried away by the process that it will be difficult to stop you! Each time you will get better and better, and the drawings will become even more interesting. A painted glass glass with your own hands looks very nice, each shape carries a certain meaning and possible words. Even the simplest glass can be turned into an incredible gift.
Important! First, practice painting mugs with your own hands on a horizontal surface, so you can fill your hand and easily draw any image on a glass of various shapes.
Painting a glass with baked paints
At the very beginning, we prepare the necessary materials and tools:
- Glass cup.
- Surface degreaser (dishwashing detergent is suitable).
- Baked paints for glass and ceramics.
- Special contour for glass and ceramics.
- Tassels of different widths.
- Duct tape.
- Cotton buds.
- Soft sponge.
Let's start creating:
- First, select the desired drawing and transfer the sketch to paper. Examples of images can be taken in magazines, searched on the Internet, or even better, come up with your own.
- Next - insert and fix the drawing inside the glass, degrease the outer surface for drawing.
- Using the glass outline, we draw a pattern on the surface of the glassware.
- After the contour has completely dried, we proceed to painting the lower part of the glass. Lightly dip the sponge into the baked paint, apply it on the glass with light movements, achieving uniform coloring. It is best to apply several layers of paint so that there are no gaps.
- With the help of a cotton swab moistened with water or alcohol, we wipe unnecessary places touched with paint.
- At the next stage, we color the drawing, finishing the final touches.
- We wait a few days, and then bake in the oven, following the instructions on the paint.
- When the image is baked, cool the glass until it cools completely.
- Now we stick adhesive tape on the rim of the product and paint it over with the same paint as the main drawing. Various figures can be cut out of such a tape: stars, circles, hearts, and then stick them on a cup and cover, for example, with golden sparkles.
- All glued elements are once again fixed with paint.
Painting a glass with stained glass paints
Using stained glass paints is the second way to paint on glassware. Since they are transparent, they can be used to create a beautiful image that mimics a stained glass mosaic. Such paints cannot be baked, so they can decorate dishes that are not used daily. Next, we will tell you how to paint a mug with your own hands with stained glass paints.
Important! The surface of such items can be coated with a special varnish to extend the service life. In any case, such painted glasses must be washed very carefully, without the use of detergents.
Glass candlesticks and electric lamps, painted with stained glass paints, look unusual:
- Using a special contour on glass, we apply the selected image to a pre-cleaned surface.
- After the paint dries well, fill all parts of the picture with stained glass paints.
In work, you need to take into account such nuances:
- Make sure that each part of the fill pattern is small so that the paint does not run.
- Do not try to cover all areas at once. As soon as one part of the drawing dries, proceed to paint over the next.
- Hold the glass in a horizontal position, periodically turning in different directions until the paint seizes. Only after that you can fill in the next element on the glass.
Important! If you are using organic-based stained glass paints, then only work with them in a well-ventilated area, as they have a strong smell and take much longer to dry.
Dot painting of glasses and mugs
This method of decorating glasses is a little more complicated than the previous one, but it can be handled. Such do-it-yourself drawings on a mug will look very original, since not a continuous drawing is applied, but only its fragments.
For work you will need:
- Contour paints for glass and ceramics.
- Water-based acrylic paints (or ceramic marker).
- Thin brush.
- Degreaser.
- Cotton pads for surface cleaning.
- Cotton buds to correct the image.
Detailed master class:
- Degrease the surface of the glass or cup.
- We draw a sketch of the selected image or pattern with our own hands or print the drawing on a printer.
- We test all tubes of paint so that the paint is not too thin and not too thick - it should squeeze out easily enough, but not a continuous puddle.
- On a piece of paper, we train to put dots of different sizes: small, medium and large diameter, taking into account the force of pressing and the interval.
- As soon as you see that you have filled your hand and make dots of the same size, then proceed directly to the drawing itself, given the indent from the edge of the cup about 2 cm.
- We fix the finished image. To do this, put the cup in the oven, heated to 150–170 °. Markers usually don't need to be baked - they just need to dry out within one day.
Important! To beautifully decorate, make sure that the distance between the points is as uniform as possible.

Basic rules for spot painting cups:
- In order to stick the sketch on the back of the glass, use a transparent wide adhesive tape.
- If you draw on ceramic circles, then with the help of a sketch you can outline the contours and lines of the main drawing.
- You can use a ready-made stencil or template, or cut out the figures with your own hands.
- It is very important to keep the same distance between the points. Each point must be separate so that one solid line does not turn out. Do not forget that the larger the diameter of the dots, the more spaces you can leave, and the smaller the dots, the less distance you need to maintain.
- First you need to apply large dots on the main part of the picture, only after that finish all the other details.
Important! Thus, you can decorate glasses not only with dots, but also with peas, which can be painted with acrylic paints using plastic from a simple pencil, cotton swab or brush. Decorating the bottom with a sticky decorative satin ribbon is as easy as decorating a mug with lace. To do this, glue transparent double-sided tape on the cup, and on top - decoration material.
How to paint a mug with nail polish?
This is the easiest, fastest and most affordable way to draw a picture on a cup with your own hands. Such dishes will look creative and stylish in autumn. Every girl has more than one nail polish at home, which makes it easy.
For work, we take the following materials:
- Acetone.
- Cotton pads for surface treatment.
- Cotton swabs for image correction.
- Nail polish of different colors (quantity optional).
- Any container with warm water (plastic or ceramic).
- Toothpick for mixing varnish in water.
- Napkins for cleaning.
Algorithm of actions for applying a picture with nail polish:
- First of all, degrease the surface of the mug with acetone or alcohol.
- In a pre-prepared container with water, add varnish. If you want to make a light coverage, then you can add just a few drops of varnish, and for a more saturated color - more than 5 drops.
- After the first varnish, immediately add the following shades.
- Using a toothpick, stir all shades of varnish in water.
- At the final stage, we lower the mug into a container with homemade paint. As a result, we will see how the resulting solution will cover the surface of the cup with beautiful stains.
- If necessary, fix the resulting image on the cup with nail polish remover and leave to dry for 2 hours.
That's all! Only 20 minutes, and the original decor is ready!
If you want, you can additionally paint the mug with acrylic paints or write a congratulation or a funny inscription. But please note that such dishes cannot be used in the microwave.
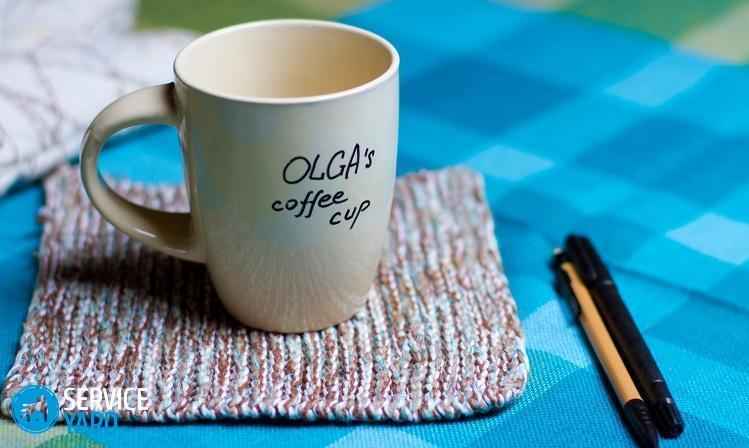
How to make an inscription on a mug with a marker?
A plain cup can be painted in an original way using a special marker. You can draw absolutely everything on it - from drawings to funny inscriptions. In our detailed master class, we will tell you how to transfer a finished template or create your own.
What we need to prepare:
- 1 white porcelain mug.
- Fine black ceramic marker.
- Soft simple pencil.
- Scissors.
- Sticky thin tape.
- Wet wipes.
- A4 white paper.
- A printer.
Let's start painting the cup:
- We take an inexpensive ceramic mug. Before applying the inscription on the cup, thoroughly clean and dry its surface.
- After the drawing is applied, you need to wait a day for the marker ink to dry completely.
- Now we preheat the oven to 170 °, put a cup there and turn on the timer for about 30 minutes.
- Once the time is up, never take the cup out of the oven. Otherwise, the varnish may simply crack, and you will be disappointed with the result.
- When the oven is completely cool, carefully remove the painted cup from the oven.
- We check the durability of the inscription with a wet cloth. If it is erased in places, then we heat it again according to the same scheme.
- When the drawing is firmly baked on the cup, we can assume that we have finished our work.
Now it remains to enjoy the result!
footage
Today we told you how you can beautifully decorate a mug using various simple methods: painting on glass, on ceramics, decorating with individual elements. Now you will be happy to drink your favorite coffee from the original cup made by yourself. We wish you creative success and inspiration!
And prosperity. Creating a floating cup with your own hands is a creative process, very exciting and low-cost, and its result will delight you!)
The flying bowl looks very attractive and will add additional coziness and comfort to any home or office interior. Can be a great gift for your family and friends! Making a floating mug is not difficult, the main thing is to know the basic principle of its manufacture and pay special attention to details and colors.
Master — Yaroslav Ovchinnikova
materials
1) tea or coffee pair (cup and saucer)

2) glue for connecting the "pouring" design with a bowl and saucer. It is better to use Moment universal gel glue for ceramics, plastic or glass. Any other adhesive designed to work with smooth surfaces can serve as an alternative. A glue gun is also used, but it is mainly designed to work with rough surfaces. There is a possibility that the cup will peel off in the near future, after gluing.
3) thick wire, or triple wires. You can use other well-flexible objects, for example, old aluminum forks or spoons, a metal hanger.

superplastic) is a self-hardening thermoplastic. When heated, it becomes plastic and convenient to give it the desired shape. When cooled, it becomes hard, elastic and durable.

5) painting scotch- they can replace superplastic
6), can also replace polymorphus. It resembles plasticine, but unlike it, it hardens well in air. It contains natural ingredients (cereal flour dough), therefore it is absolutely safe for children.

7) decoration items cups: coins, flowers, cones, feathers, candies, beads, buttons, ribbons and much, much more.
Cup assembly process
The process of creating a floating mug is not at all complicated, but there are several important nuances that must be taken into account when creating it.
The main secret in creating a flying bowl is to choose the right tea pair. The cup and saucer should not be too heavy. Given this condition, it will be easier to create a flying bowl!
We construct the base of the floating cup, this is the element that connects the saucer to the cup. To do this, take the wire of the desired length. It is important to consider that the distance between the bowl and the saucer should be approximately two cups. With these parameters, the flying cup will look the most balanced.
Inside the bowl, we form a loop from the wire, the diameter of which should be 2-4 cm. This will help to achieve a better fixation of the wire in the cup. We twist the second end of the wire into a flat spiral in two or three turns. Thus, we get a kind of stand, which we will fix in a saucer.
The tilt radius of the resulting structure should not exceed 45 degrees, otherwise the structure will be unstable!

Polymorphus is the best material for making a flying cup.
We take a piece of polymorphus, immerse it in hot water for 20 seconds. During this time, the material is converted into a soft plastic.

With the resulting plastic, like plasticine, we stick around the base, giving the desired shape. If the plastic hardened before you had time to finish the work, then simply dip it again in hot water. The prepared base will completely harden within 15 minutes.

If you do not have this material at hand, you can use the modeling mass. An alternative to these two materials can be masking tape, which is simply wrapped around the wire base. Or you can wrap the wire with felt or other cloth, after smearing it with glue.
An important aspect is the constant fitting of the base on a saucer with a cup in order to see the shortcomings in time!

Pay special attention to the edge of your cup in the place where the structure will be attached!
In this place it is necessary to make a kind of step in the form of a prop. So the design will hold much more reliably.

When the base is ready, you can begin to fix it on the cup. Lubricate with glue all the contact surfaces of the base with a saucer and a cup. Press firmly and hold for 3-5 minutes. Don't forget to glue a step to support the cup!
We fix the flying cup on soft objects in the right direction and leave it in this position for 5 hours. During this time, the glue will dry well and securely fix the resulting floating bowl.

When the floating cup is well glued, you need to check how stable it is.
If the saucer is not able to hold the cup, then it is necessary to reduce the radius of inclination of the structure until it becomes stable.
The last stage of making a flying bowl is the most interesting and creative. Decorate a cup! We apply glue-gel to the decorative elements and glue it.

It is better to glue the large elements first, and glue the smaller ones last. This will hide small visible flaws and gaps between the elements.

After all the decorations are glued, it is necessary to let the cup stand for 5 hours so that the glue dries.
The process of assembling a flying bowl is discussed in detail in the master class.
Hand-made from the Masterclassy website:
Flying flower mug


Nata Liana tells how to make a floating cup "Summer Mood":

Flying mug of fruits and berries
With the help of plastic fruits, berries, mushrooms, you can create such a fruit and berry abundance pouring from a cup. perfectly complement your fruit and berry

A floating cup can be decorated with bright gifts of autumn. Dried leaves and flowers can also be used. The mug can be replaced with a wooden barrel made from simple ice cream sticks.

Flowers and fruits are harmoniously combined in a soaring stream. Butterflies, dragonflies, ladybugs will be a wonderful "live" addition.

Floating money mug
A floating mug and looks very stylish. The design trick with the use of a zipper will also add originality to your mug. Keys, bells, old small toys - everything can be used as decorative elements for your mug.

With coins, you can also use imitated banknotes, in which.

The secrets of creating a money mug can be found in the Sveta DIY video tutorial:
A money tap is created on the same principle as a flying mug. Instead of a mug, we respectively use a plastic tap, and a saucer can replace a small chest or. Coins will look more spectacular if they are covered with gold spray paint or varnish.

Master — Anastasia Spitsyna
Cash flows can be depicted using paper bills.

Master — Oksana Ankudinova
How to create a money faucet can be seen in the master class
DIY gifts:
Flying mug with birds
The bird is a symbol of lightness and freedom, it is very often found in interior solutions in various styles and variations. This motif is also reflected in the decoration of the floating mug.
A floating mug can be a wonderful nesting house for birds. The nest resembles a hearth and an idyll in it.

A cup with daisies and a bird with a nest looks like a real symbol of family, love and fidelity.

A bird with delicate roses, fluttering butterflies and other decorative elements will help create a summer soaring composition.

You can decorate a flying cup with simple pasta. It is better to take pasta in the shape of a bow, paint them with acrylic paint, decorate the middle with pearls. We decorate a mug with them and the waterfall of bows is ready!

Such a mug looks elegant both in pastel colors and in classic colors - black and white.


Flying bead mug
Pearls are the most noble element of decor that will add festivity and pomposity to any craft! A simple white tea pair can be transformed into such a pearl miracle!

A very delicate floating bowl will turn out from pale pink and matching pearls. A white dove will perfectly complement the composition).

Beads of various colors will also help to create a unique pouring cup. Flowers and ribbons in the same shade as the mug will perfectly decorate and complete the look of your mug.


Make yours more magnificent and elegant:

Masterpieces of needlework cover in their master class how to make an Easter hovering bowl:
He talks about another type of Easter composition in the DelkiRu master class:
Unusual flying cups
Instead of a flying cup, you can make a flying teapot. Such a composition will look very original on the table of your kitchen. When performing such crafts, it is better to choose a teapot of small size and weight so as not to overload the structure. A “pouring jet” from a teapot is best made from thin, strong wire (for example, knitting needles) and superplastic.

Hanging flying cups with flowers can become an original decoration of the decor! The main thing is to secure them securely.

Give your own mug a personality with a porcelain marker. In this tutorial, you will learn how to transfer pre-made templates or create your own. The possibilities are endless! Let's start.
What do we need
4 white porcelain coffee mugs.
Black porcelain marker with fine tip (1 mm).
Soft pencil (HB or 2B).
Scissors.
Duct tape.
Wet wipes.
A4 white paper and printer.
How to decorate a mug with your own hands
We have created several models of funny monsters to decorate your mug. If you print them on A4 paper, they must be the correct size to fit a standard mug. For this tutorial, I've printed the medium monster in double size since I only want to use its head. Of course, you can also print any other design of your choice.


Print and cut out the monster.

Make sure the mug is not greasy or dusty. See how it will look on the mug by attaching a printed template.


Using a soft pencil and applying a lot of pressure, trace the main lines of the drawing onto a plain white piece of paper.

Now rotate the monster image and place it face down on the mug, secure with duct tape.

Using a pencil, transfer the image to the mug. Apply a lot of pressure and make sure you don't miss any detail.


Carefully remove the paper.

Now you see the silhouette of the monster on the mug, it will be used as a template.

Before you start using the marker, make sure that the line thickness and amount of paint is right for you.

Carefully create the main contours of the monster.

Oops! Mistake? Don't worry until the marker is dry, you can touch up the outline with wet wipes.

The main circuit is completed.

Guided by the printed template, draw all the details for the monster.


You can also decorate the handle of the mug if you have patience :)


And the mug is ready! Now let the marker dry, it all depends on the brand of the marker - some dry for a day, but others will have to be put in the oven. After drying, your mug can be safely washed in the dishwasher.


Each girl is interested in her zodiac sign and its subtleties, and especially when a child is born, she may not know the names suitable for Pisces.