
Passage of the game crisis part 3. Achievement guide. Under Columbus Square, New York
Chapter 1
After watching the introductory video, we get out of the cryo-chamber and follow the Psycho into the next compartment. Having exchanged a couple of words, we open the weapons menu (“BACK”) and install a silencer on our current weapon. In addition, you can install a laser sight, however, there is practically no benefit from it. When Crazy opens the door, activate the camouflage ("RB") and carefully remove the guard who is throwing up overboard. Having picked up his rifle, we equip it with a silencer (the game is designed in such a way that it is easiest (and most importantly, most interesting) to pass it in stealth) and turn right. Having split with a friend, we go down the stairs and deal with three bored guards. Having opened the doors for the Psycho, we get a bow and open the weapons menu. Having chosen carbon arrows (the most silent) and a high level of tension (the most effective), we help the partner to climb up, after which we take out the nanovisor. Its functionality differs little from the functionality of the visor from the second part. Just point the sight at the enemy or equipment and wait until the triangle turns green.
Having marked all the mercenaries, we squat down and activate the camouflage. It is better not to engage in an open firefight, as this, even at the lowest difficulty level, can turn into death for your character. The easiest way is by small dashes (and stops to recharge the "batteries" of the suit) to get to the final goal, killing only those enemies that prevent you from passing. Having reached the destination, we stumble upon a locked door and contact the Psycho. There is no workaround, so you will have to pick the lock using the suit hack device. This is not difficult to do - just press the button indicated on the screen in time. Having finished, we go inside and go down the stairs, where our partner is already waiting for us. After talking with him, we go outside and use the scanner to mark another group of enemies. Like last time, getting past them will not be difficult. "Batteries" can be recharged behind the boxes, after making sure that you are not noticed from the upper deck.
#2
Be careful - if you make a mistake and you are noticed, then a helicopter will take off into the air. Needless to say, hiding from him would be next to impossible, I guess. Having reunited with the Psycho, we hack the control panel and silently (or with a shot from a shotgun, if before that you acted openly) we remove a lone mercenary talking on the phone. Going down, we fold the bow and take out firearms. You can leave the silencer, however, it will be much easier to go through the rest of this episode in the open. After clearing the room, we climb to the upper level and go through the only open door, after which we turn right. Finding the elevator, press the call button and go down. Before the cabin reaches the desired floor, turn on invisibility and jump to the side. When the mercenaries make sure that the elevator is empty and stop shooting, we break open the turret located behind them and enjoy the spectacle. Having opened the doors for the Psycho, we go up the stairs and watch the video.
 #3
#3
Chapter 2
After talking with the Crazy, we select a blue container from the floor (in the future they will be indicated by the visor symbol) and press the "BACK" button. Having bought the skills you are interested in (there is zero sense from them - so you don’t have to bother too much), we go out into the street and run after the Crazy until he asks us to hack the mine sensors. Having done this, we cross the bridge over the cliff and turn right. Having broken the door with his foot, we go up the stairs and watch the video. Our task is to destroy the CELL defensive tower. Jumping down, turn on the disguise and run to the farthest marker. Having examined the boxes with cartridges, we move over the fence and tear out his weapon from the "hands" of the stiffened alien. Having activated the "reinforced armor" mode, we jump out from behind the shelter and open fire on the turret guns. The charges in the Zeff toy are infinite (for now), so you don’t have to worry too much about this. When finished, turn on the disguise and slowly move forward. Having met with a group of mercenaries, we mark them with the help of a nanovisor and take out a bow.
 #4
#4
You can ignore Psycho's advice regarding arrows with an electric tip - they are not very effective in water, as they stun only those soldiers who stand directly next to the epicenter of the "explosion". Calculating the exact distance is difficult, so it's best to save your arrows for when you really need them. After clearing the territory (or sneaking past), we climb up the slope and meet with the Crazy. After a little chat, we jump into the hatch and go forward along the tunnel to the first turn. Once in the next room with enemies, turn on invisibility and use the suit to hack the turret. She will not kill everyone, however, and such assistance can be very useful if you are playing on a difficulty level above average. Having finished off the remaining soldiers with the help of carbon arrows (do not forget to pull them out of the corpses - you can replenish the stock of arrows only with the help of special containers, which are far from everywhere), we go up the stairs and move forward along the bridge. After jumping over the cliff (for this you need to take a good run up and hold down the jump button), turn left and watch the video.
Chapter 3
Having picked up an improved rifle (a good replacement for a bow if it has run out of arrows - silent, roomy, with an optical sight) and stuffing our pockets with cartridges, we slowly follow the Crazy forward, skirting the collapsed sections of the floor. Having jumped down for a partner, we turn around and run straight to the first turn - we go there. Having crossed the blockage (for this you will need to sit down), we open the indicated doors and jump into the elevator shaft. After examining the elevator, we jump to the next cabin and watch the video. Having emerged from the water, turn on invisibility and equip the bow with arrows with a detonating head. When the CELL mercenaries gather in a heap for briefing, we shoot at the center of the “heap” and enjoy the result. Having finished off the remaining enemies with the help of carbon arrows (be sure to return them before leaving), we jump down and mark the reinforcements that have arrived at the noise with the help of a visor. This will make it a little easier for you to play hide and seek in the future. Our main task is to get to the top of the dam and destroy it. This is what we'll do. We have two paths - right and left. There is not much difference, so choose for yourself.
 #5
#5
Having reached the elevator (it is better not to engage in an open battle, because even at the lowest level of difficulty, this can result in great trouble for you), we go upstairs and watch the video. To disable the dam, it is necessary to disable two generators. Having jumped into the water, we dive deeper and row to the left hull. Having climbed into the ventilation (there is another way, however, it is much more difficult and dangerous), we go down the stairs and turn off the first generator. Having fought off the mercenaries (you can make some noise - you can’t be heard above), we return to the fresh air and go to the right building. It is practically no different from the previous one (the layout is one to one), so you most likely will not have any problems. True, this time it will not be necessary to fight. You can also complete a side quest here. They do not affect the plot in any way, but their implementation is generously rewarded with points for pumping the costume. But since this pumping is useless - it's definitely not worth wasting time on side missions. Returning to the surface, we jump into the water and set the explosives at the base of the dam.
 #6
#6
After recovering from the explosion, we get out to the shore and contact Claire. Having received a new task, we turn left and swim under the collapsed building. Having neutralized enemy mines, we climb into a giant dry pipe and run forward to the stop. Once at the CELL base, we hack the turret and, having activated the camouflage, head to the elevator while the mercenaries deal with the out-of-order weapons. If everything went well and you were not spotted, click on the button for the desired floor and watch the video. Our task is to find out the nature of the origin of the CELL energy source and destroy it. Going down, we take out the bow and prepare for battle. After cleaning the room, we cut down the security system and go up to the second floor. There are several computers here, each of which needs to be turned off. Having finished, we interact with the marked control panel and watch the video.
 #7
#7
West 30s Gate, Liberty Dome, New York
The personality of Alcatraz, the protagonist of Crysis 2, was destroyed by alien spores, after which it was replaced by a nanosuit with the personality of Lawrence Barnes - "The Prophet", who copied it into the suit's memory before putting it on Alcatraz and committing suicide, since he was already dying due to alien infestation. With such a cunning explanation, the developers "returned" the Prophet to the ranks. In the third part, he is the main character.
Two decades have passed since the events of the second part. During this time, CELL Corporation practically seized power in the world. All this time she kept Alcatraz the Prophet captive, experimented on him and all that, we don't know for sure, and it doesn't really matter. He is currently on a ship bound for New York to separate the nanosuit from the body, which has already been done with all the other soldiers wearing the nanosuits. The game begins with a resistance group led by Michael Sykes - "Psycho" sneaking onto the ship and freeing the Prophet.
At this very moment, we are handed control. A heavy downpour lashes the deck, but in a nanosuit it is not terrible. We go down the ladder, or just jump, to another ship and follow the Crazy. We climb the stairs and go inside. The first CELL soldier can be killed stealthily with a knife, or with a silenced pistol. He has a good machine for short distances. You can throw a load on the mercenary in front if you shoot at its mounts. Then decide for yourself whether you want to go quietly, using disguise, or with a twinkle. For the last option, large red barrels are placed here. We pass to the other side, go down the stairs and open the door for the Psycho. An alternative quiet route is through the ventilation that runs underneath. We continue to follow a friend. He is handing us the most powerful weapon of the future - a nano bow with nano arrows, called the Predator. Not bad, soon they will probably invent a nano-stick and nano-stones. In the meantime, we are content with what they give and go down the stairs for the Crazy. Here on deck, it's just the perfect place to test out the nanobow. Targets at different distances and heights. Disguise does not disappear when fired! This is perhaps the most valuable thing in it. You can also pick up used arrows. When all opponents are killed, the Psycho will climb the stairs on the other side.
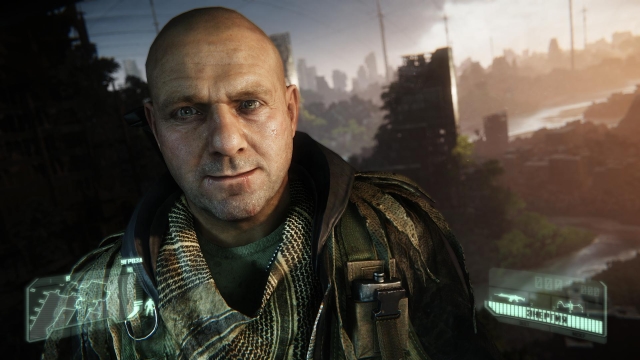
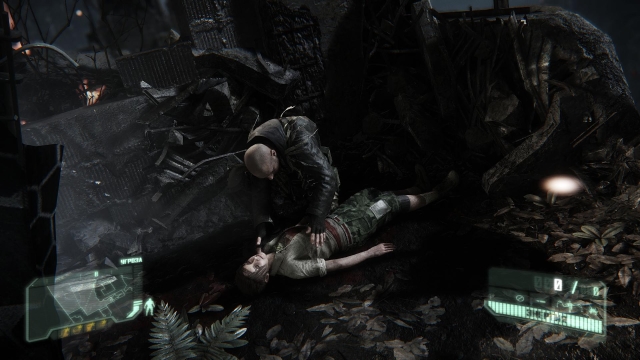
Going out on deck, you can see a helicopter and explosions in the distance. You will need to make a hack to go further. The matter is elementary, included in the training before the start of the game. You can play it at any time by selecting "Training" in the "Campaign" section of the main menu. She will answer most of your questions about the management of the game. Turn on the tactical visor [B], select the target and press [F], then click at a certain moment. We go down. Here's the screen showing Psycho during the extraction from the Nanosuit. It is a very painful memory for him. We go further and clean up a new area. The helicopter can be shot down with just one exploding arrow. To install it, press [X] and select "explosive fragmentation" ammunition from the list. Break open the door and go inside. The psycho is behind, so we go on all alone. We pass through the scanning chamber and find ourselves in a compartment with very strange mechanisms. Radiation comes from them, and the people who are here wear protective suits. We pass by, through a room with armchairs retractable from the ceiling. We fall into another room, with tanks that emit a bluish light and contain strange objects. Possibly alien origin. We break the glass and go forward. There is a turret here that needs to be hacked while in stealth mode and fully seeing it in front of you. After that, we meet with Psycho. It offers a view of New York 2.0, covered with a dome. And, I must say, overgrown with all sorts of plants, which this impromptu greenhouse came to taste.
Chapter 2: Welcome to the Jungle
We leave the elevator and follow the Psycho. He will stop before upgrading for the suit. We take it, then press [H] and get into a large perk selection menu. Now we have four points, and we need to distribute them wisely, building a successful sequence. We can also see stat changes and requirements that need to be met to get a more powerful variant of each perk. When you decide, you can go outside, right into the jungle.
Westside Yard, Pennsylvania Station, New York
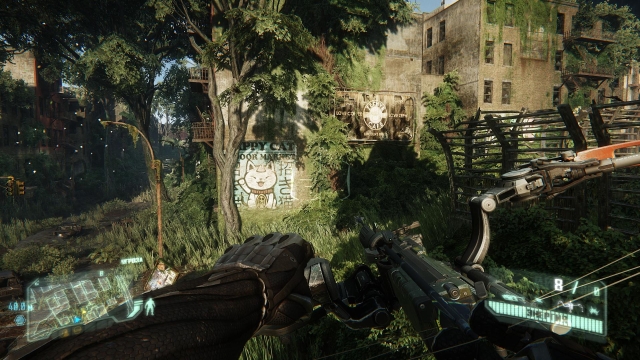
In this place, I really want to turn on the immortal composition Guns N "Roses - Welcome To The Jungle. There is simply darkness of all kinds of vegetation around, the walls of buildings are covered with lianas and moss, the tops of trees are visible from their roofs, mushrooms peck in the shadow of the skeleton of a taxi, and the amount of grass grows From the front, even a couple of deer come, who already feel in New York as in a real forest.Perhaps, the first exit into the "urban jungle" can be remembered for a long time. wants you to break mines.You need to aim at the mark with a red skull.After passing through the mined bus station, we stumble upon a frozen tripod cef, Screamer.He has been standing like that for a very long time and, most likely, is dead.The psycho is trying to open the door to the passage, but not maybe without the nanosuit. The Prophet will have to help him. The railroad has long been abandoned, rusted and overgrown with vegetation, but we are not here to ride the train. Here Crazy shows the Prophet a watch tower that looks out for violators and can deliver a missile strike. The old comrade himself was completely unglued and different, but you can understand him, now he is just a man, one of those whom he could kill dozens at a time before. Therefore, the Prophet will go under the bullets.
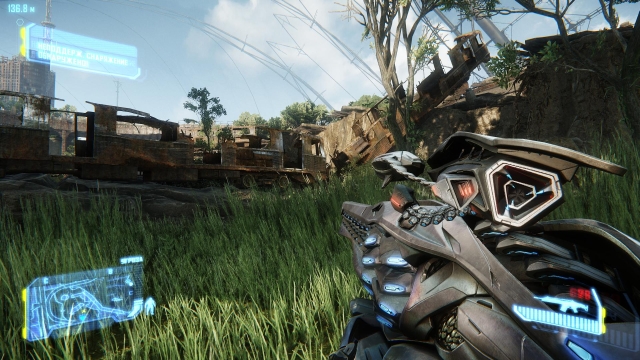
The map shows the places where weapons should be located. You can only move in stealth mode. Even the tall grass in the ditch does not protect against detection. While recharging energy, you need to hide behind large obstacles. We simply inspect the places one by one until the last point remains. We jump down and find dead cephs, as well as their weapons. It's an alien sniper rifle. With its help, you can shoot three rocket launchers on the tower. Now you need to hack the minefield to go further. Interesting: if the mines still do not affect the CELL soldiers, then why mark them? We jump over the collapsed train and move on. The enemy has already landed on ... the lake? Well, more like a big puddle. This is a great chance to try out electric tipped arrows for our nanobow. We shoot between two walking soldiers and admire the result. And what circles diverge on the water! We finish off the rest, including the arrived landing by helicopter, which cannot be shot down. We go further.
An additional task appears: find the source of the CELL location. Its marker is not easy to spot, so activate the visor and mark it. We pass under the destroyed bridge. Here, a couple of soldiers are trying to break open the container, but they can't. But the Prophet can do it, and inside there is one point for upgrading the nanosuit.
You know, that voice talking about rebel activity… not to mention the ruined city, the corporation that took over, the return of the hero to the ranks after twenty years… personally, it reminds me a lot of Half-Life 2, City 17, Gordon Freeman, the totalitarian government with harvesters. This is not to mention the nanosuit and all the similarities of the story with aliens in the previous parts. I will not mention the similarities between these games anymore, but you will easily notice them yourself. However, this is just my subjective feeling, reinforced at the moment by rails and trains, and something in the future.
At the top we find Psycho. I wonder how he got here before us? We jump into the hole in the floor. The prophet slams against the stones, and the Crazy descends on a cable. It's also called a friend. We move further along the tunnel. We open the door while Crazy climbs the stairs. We go through the door and break open the turret. She will not live long, but she can take someone with her. We kill the rest and climb up the stairs to the top, on the way. The psycho is already here. We scatter and, holding the gap, we find ourselves near it. We pass forward, we select a black box from the wrist of a soldier who was not killed by us. We jump over the wagon, take ammunition and move on. We pass through the door and see ... a living cef! He killed the CELL squad and disappeared somewhere. We jump down into the tall grass ... and find the cef of the Hunter, even two. The psycho also saw such, says that they are wild. We go further through the channels. Mines on the walls easily explode from one bullet, so there is no point in wasting arrows on them, as the game advises. We climb the stairs and find ourselves in the rear of the CELL squad. There are a lot of them here, so you need to mark them all with a visor at the beginning in order to know their whereabouts. It is also worth doing hacking turrets. And landing assistance is expected from the roof. At the other end of the depot, we climb the stairs and go to the goal along the top. This is a rope on which you can slide to the exit. CELL turned on the suit blocker, so we don't have a tactical visor. Although all other modes are in order. And there are also a lot of Ceph hunters who hid in the grass, and we won’t be able to detect them. However, this is not a problem if you climb higher, for example, onto the roof of the car. So you can shoot them with almost impunity, especially if you previously picked up a grenade launcher. The blocker is such a small antenna, standing on a large concrete platform. There is a red barrel next to it, and there are also cartridges nearby. Now you can make your way to the Crazy, who is behind the stationary machine gun. Behind it is a pyramid-shaped container in which a grenade launcher is hidden. But the machine gun is still preferable to unhook. We follow Psycho. The tunnel cannot be opened even by the Prophet, but he can push the fuel tank along the old rusty rails. Both old warriors climb onto the roof and rush on it through the tunnel, shooting at the sides if they wish.
Chapter 3

Crazy brings Prophet to the headquarters of the resistance. Here, Claire is trying to command a dozen squads of rhinestones. I wonder, hugging in front of everyone, does he and Psycho really think that no one will notice anything? And this dangling old man is Karl Ernst Rasch, the creator of the nanosuit. Here are ALL four characters of the game assembled. Claire and Rush don't trust Prophet much, but are happy to send him away to save their lives and destroy CELL. And none of them believe his prophetic visions.
Nassau Street, Financial District, New York
The exit from the headquarters leads directly to the dam. An epic spectacle, the rendering distance and detail are amazing. The lunatic wants to get out of here as soon as possible before we are identified as the headquarters of the resistance. Three helicopters rush past, they could notice two travelers. Where Crazy stops, you will need to crouch and crawl into a narrow passage. From here you can see a huge antenna. But for now, we need to turn off the power to the dam. The psycho opens the elevator doors, it's hard for an old man without a suit. We jump down into the shaft, onto the roof of the second elevator. He can't stand it and falls into the water. We get out and find ourselves in a dark basement.
At the exit from it, an enemy detachment is found, landing from a helicopter. We fix them with the help of a visor and go to kill. They are so good that they all die with one grenade. Two more large groups on the left and right. This is a very large area, it is not necessary to go straight to the blue marker. There are many soldiers here, several vertical positions, several turrets. If you go to the left, you can find a Nanosuit Upgrade Kit guarded by two turrets and a Heavy. As well as an elevator leading to the top of the dam. In the middle are the ruins of a skyscraper, dark and overgrown with moss. There is also an elevator on the right. I chose just him. Passed easily under the lasers, but turning on the elevator betrayed the Prophet. The elevator stopped and we had to climb out onto the roof. From it there is a passage to the ventilation shaft. While the CELL mercenaries are hammering into the elevator, we go around them and jump right on their heads! Here you can find a container with a typhoon and a sniper rifle. The typhoon is still more relevant, since there will be a lot of enemies. But in general, there are many options, do what you want.

We find the first tower immediately. We make our way inside and go down. Here we reprogram the CELL anti-aircraft battery and turn off the generator. New soldiers are approaching, so the Prophet does not waste time trying to deal with the equipment, but simply breaks some pipes with his hands, from which the whole structure collapses. The stairs collapse, but a long jump allows you to climb up and so on. To blow up the helicopter, you can use the rocket launcher, which is located at the exit. But in general, this entire zone can be passed by changing only heavy machine guns. Now we go to the second tower with the generator, identical to the first. You can turn it off by simply using the controls. Now the Prophet decides to bring down the entire dam by planting explosives. Why then did we bother with generators? The Prophet is surrounded by CELL helicopters, but he jumps off the dam on a cable and detonates the bomb. Here is an explosion! Water washes away the dam, fills the streets and forms a small city river. Claire treats Prophet like a goddamn robot, which is starting to get annoying.
Moving on, you need to find a certain System X complex. Along the course, you can find a certain CELL beacon. But swimming is still not as interesting as jumping over the ruins. Soon a large detachment of the enemy stands in our way. Just behind them is the path to a crashed helicopter carrying a suit upgrade, as well as some data. Now we can return to the main task. We pass further downstream and climb into the formed cave. We cross a small waterfall, and meet ... two squirrels! If you hit one, the other won't even notice it. Hmm. If you go to the right, you can find a bonus to upgrade the costume. There is none on the left. We break open the turret, neutralize the mines, and you can begin to storm the System X complex. You can get inside in different ways, there are wide drainage pipes to the left and right. Once inside, you can start the operation and clear the complex of interfering soldiers. The unfortunate little robot does not need to be touched. We climb into the elevator cabin and go down underground. To go up, you need to turn on the crane using a small screen. Then we make our way through the container and restore the air pressure with the help of one, and then another remote control. A raging defensive installation can be calmed down with the help of heavy weapons. Or breaking the most complicated lock on the console in the center. Now we take the elevator to the very top. CELL are well established here, but where are they up to Romeo One? At the very top, you can disable the Nexus. What a surprise, it turns out that all this time the CELLs have been using the Alpha Ceph as their secret power source. Well, now he is free, thanks to the efforts of the Prophet and the forces of resistance.
Chapter 4
Delancey Street, Chinatown, New York
Once in Chinatown, the Prophet encountered a CELL detachment. For some reason he killed one, but the others did not find the body and left. The highly detailed nanotoad, familiar to us from the video clips of the game, also visited the frame. So we're in a flooded Chinatown. CELL roam the swamp, and the Prophet at this time can climb to the second floors of the destroyed buildings. If desired, you can play "Predator" or "Rimbaud" from yourself. Electric arrows work great. There are also several turrets and minefields. There is also an observation tower with searchlights. Crazy thinks that there is CELL data nearby, including information about who tortured him. Interesting idea, let's go and check it out. "Some problems of a personal nature," mean. As long as it's not me, whatever. The desired folder is located near the helicopter crash site. Looks like it doesn't have what Crazy is looking for. You can return to the main goal. You will need to climb to the top floor of a residential, high-rise building to use the cable. Claire will say that Karl Rush escaped from the base to no one knows where. The house, meanwhile, is shaking, ready to finally collapse. You need to overcome this maze and go out into the street.
Here we meet Alpha Ceph again. And others, smaller. Claire's fears are understandable and interesting: could the mind of the Prophet, or rather a nanosuit, be captured by the collective mind of the Cephs? For now, let's just have some fun and hunt Ceph Footmen. From the body of one of them, you can pick up an alien machine gun. They also have a shotgun. After killing the aliens, we get to their strange structure. We hear Rush's voice, we see visions, we call Psycho. What the hell happened? It is only clear that we need to move on. Ahead, CELL soldiers are burning alive. They also fight the Cephs, but lose hopelessly. There would be a dozen fighters in nanosuits here ... oh wait, they were all destroyed. Soon we come to the door and meet with a new Ceph - Pyro. And he is not alive, but a robot. His armor is serious, especially on top. Therefore, we do not shoot when he is defending himself. It is better to use something powerful, like grenades, rockets, explosive arrows. Bullets are practically useless. We pass through the building and meet many more of the same arsonists. If hacked, they become harmless for a short time. In an additional task, you need to hack the Screamer robot. It would be nice to have such a big friend around all the time! Next, we meet a flying round Ceph reconnaissance robot. He is followed by a whole detachment of infantrymen. The next goal is to get to the elevator. We break open the control panel on the side, the bridge falls, we rise and see a huge tower.
Psycho is already waiting in the elevator car. We rise with him above and go in. It’s like Mamai walked around here. Furniture scattered, CELL bodies everywhere. Psycho was kept in these laboratories and Cephs were studied. Some copies are still locked inside. The other one seems to have come loose. The psycho will stop in front of the door and ask you to open it. Inside, apparently, the place where the nanosuit was ripped off him alive. And no one alive. Someone to take revenge. It can be said that the evil committed here returned to these people a hundredfold. However, not to everyone. One of them survived. The psycho leaves in an unknown direction. And the Prophet will have to stop the Rising of the Scarlet Star.
Chapter 5

Pearl Street, Two Bridges, New York
In order to stop the Alpha Ceph, who escaped through the fault of the Prophet, to freedom, CELL decides to launch an orbital strike on New York. Our sentient suit is sure that this will lead to the apocalypse. But how can he be sure that these visions are really a prediction, and that it is not his actions that will lead to their realization? Let's see. In the meantime, we still need to move somewhere. Look for the Ceph brain transport device. Through strange red pipes you can move from one building to another. The second one will have a small armory with weapons and one suit upgrade. You can also move down. Near the fallen helicopter, you can take a light machine gun. Opponents in the form of infantrymen's cefs walk below, near the artifact we need. By the way, the nano-soldier tokens that the Prophet picked up in the laboratory are now hanging on the bow. We approach the spire and interact with the hologram. Eh, it's almost done! The Prophet almost got an army of Cephs at his disposal, pretending to be their Alpha male! The real boss did not like this, and now he will have to fight with this army. When the first foot soldiers run out, they will drop the robot - the Destroyer. He is armed with a mortar and very well armored. Effectively use any explosive. And you can pick up a mortar.
Now you need to go to the Archangel control station. But for now, our thoughts return to the road, where a squad of hunters is attacking the CELL soldiers who have settled in the building. The latter have an easel machine gun. We'll still need it. As well as hacking two turrets in a neighboring house. We continue moving towards the tower. In CELL they like to build everything very long. Below in the swamp hunters swarm. We kill them and go up the stairs through the dry cleaners. At this time, Claire says that her squad urgently needs help. The archangel will wait. So we get in the buggy and let's go! No weapons, but no one shoots at us. We drive onto the bridge, get out of the buggy and start making our way through the soldiers. We go down one of the bridge supports, along the numerous stairs, and jump into the water.

The psycho came to his senses and returned to duty. He will take care of Claire. Now the Prophet can again go to his goal. We carefully jump down the ruins to the ground. Here we are waiting for a new buggy equipped with a rocket launcher! There is no armor, but it should hurt to bite. But rarely, the charges are just nothing. However, on the site of the main hostilities, it will be possible to steal a tank! Look for the side quest marker and make hell for the Cephs. The gate opens with a mechanism to the left of them, you can climb the stairs there. We continue our way across the battlefield. We drive into the railway tunnel. After it, we find ourselves in front of a blocked road. A man will pass here, but a tank will not. Here you can pick up a Gauss cannon. Cephs bombard the tower. Crazy gives an additional task - to destroy the air defense tower system. This place is also surrounded by Cephs. At the very left, the first one you meet, you can pick up a couple of powerful guns with which you can deal with the rest. Only the CELL people will remain. The object indicated by the marker must simply be destroyed from any weapon. For example, from an easel machine gun, on the second level.
When the Prophet enters the CELL command center, the Cephs are already leaving somewhere. You can enter from different sides, but inside the goal is the same. The moment you get close to the bridge, it will suddenly rise. Fortunately, there is a control panel at the beginning on our side. Now you can go over the bridge and enter the elevator. I wonder why CELL makes elevators in such a strange shape? Not a rectangle or a circle. Everyone was already upstairs - Crazy, Claire and Rush. I wonder how they went through the same thing as the Prophet? Passed CELL and Cephs? Meanwhile, the Archangel made a puff and was stopped. Instead, a tunnel opened up to another…galaxy, I guess. From it should begin the invasion of the Cephs. Rush turns out to be a traitor, he was enslaved by the Cephs when he climbed into their collective mind. We did everything according to his orders, freed the Alpha Ceph and opened a short way to the Earth for the aliens. Somehow, Rush manages to kill, Claire and Crazy quickly retreated, and the Prophet miraculously landed right in the VTOL cockpit. But they were all shot down in one place. Claire died at the hands of Rush. Crazy and Prophet set out to kick the asses of the Cephs.
Chapter 6
West 52nd, Hell's Kitchen, New York
In order for Crazy to fit the VTOL here, you must first turn off the air defense. But in the beginning, you need to get to it by killing the Cephs wandering around. Among them there are new ones - Shadows. They are armed with a sniper rifle. Perhaps it is most effective to approach them at a minimum distance and just shoot them. Do not forget that it is desirable to jump down in maximum armor mode! We rise to the roof to the Ceph installation, the Prophet will independently absorb the energy of the battery that feeds it. The Cephs did not like this very much, so their reinforcements come to you. There is a choice of which setting to turn off next.
First I went to the one in the northeast, "Bravo". On the way, an SOS signal was received from a detachment of rebel mortars. On the ground, by the way, you can find the lonely head of the Statue of Liberty. And next to her - a whole tank! The joy, however, did not last long - this tank does not know how to drive along the bottom. The water level is too high for him. Therefore, we swim to the mortars on our own, kill a couple of infantrymen and get mortar support as a reward. Screamers roam here, very tenacious Cephs. Using the visor, you can mark the target for mortar fire. With their help, you can destroy the Screamers. Further, the road runs through several destroyed buildings, and at the end there will be exactly the same air defense installation. It was the Bravo point.

And now it's the turn of the point "Charlie". Around it, the rebels also need help - they are stuck in a minefield. After their release, the grateful tankers will let the Prophet go for a machine gun on their BMP. To abuse hospitality, however, is not worth it. The machine gun is useless against flying Ceph robots. Therefore, it is better to arm yourself with a rocket launcher and take them off. An additional mission also appears - to find a downed VTOL aircraft. The door is blocked by a container, and there are living rebels inside. The reward is supplies, weapons, costume modifications, things inside. The last air defense installation is guarded by a lot of Cephs, who have surrounded themselves with mines from all sides. So they ended at the air defense cephs.
It is necessary to clear the place from the newly arrived Cephs so that Crazy can sit on his VTOL aircraft. Now we take the place of the shooter. The flight will continue until all enemy aircraft are destroyed or the VTOL is shot down. Therefore, we try not to smear, and everything will work out.
After landing on the roof, the battle with the Head of the Cephs will begin.
This creature has strong telekinesis and hurls scrap metal bombs in volleys. There are a lot of covers in the arena, behind which you can hide from volleys, as well as several powerful guns and ammo boxes. So: we hide behind shelters, turn on the armor and go out to the Leader. We shoot until his volley starts. We hide, reload and go out to the next run. Covers need to be changed sometimes. The enemy will pull the Prophet to him, you will have to quickly, quickly hammer [space] to escape. Then smaller Ceph help will appear, but powerful cannons can be removed from them. The remaining time we repeat the previous steps with shelters until the creature dies. It remains to leave the roof. Alas, but busy with the boss, the Prophet missed the expansion of the white hole, or the portal to the world of the Cephs. Then he fell, and fell under a pile of rubble of the surrounding skyscrapers. Not a single person could survive this.
Chapter 7
Under Columbus Square, New York
…so it is good that the Prophet is not a man. He just gets up, brushes himself off and walks as if nothing had happened - the suit took the blow, and now he is recovering. The weapon, however, was lost, only a pistol with a flashlight and a faithful nanobow remained. We go until it falls even deeper into the water. The glitches, or memories caused by Ceph overmind interference, continue to escalate. It seems that here, under Columbus Square, these strange caves created by aliens have long been located. Soon we find direct confirmation of this, in the form of a huge structure. You can’t jump down, so we are looking for a workaround on the right. Here we find cartridges and rocket launchers. Cephs begin to meet ahead. You can pick up one of their guns. It's not even necessary to fight now - you can go around and approach this contraption that will charge the batteries of the Prophet. He will be temporarily invincible. Now the fight can begin! When the enemies run out, or you get bored, you can continue on your way.
A task will appear - find the CELL lighthouse. Looks like they've been to these caves before. And one more task - turn off the cooling of the turrets. Perhaps this is where you should start, because there are a lot of turrets here. The hologram is at the bottom, right below the first turret. From here you can also get to the first of the devices to gain energy. This is the only way to fight this strongest pack of Cephs. Now let's go look for the CELL cache, marked with a beacon. There will be one large robot, for the destruction of which you need to use a stuck tank. Looks like it's marked with a beacon. Several powerful cannons are also scattered around. We continue our journey to the brain transport device.
Fight with Alpha Ceph
After a new recharge, we will look for a wormhole, and with it the Alpha Ceph. The best weapon is the Ceph mortar, which lies here. In the beginning, you need to shower him with shots, and then knock out one of his vulnerable red dots - when the drill limbs turn red. And then fight off the capture. This whole structure with a tunnel in the middle also drills the rock of the cave, bringing down the stones, right on the Prophet. Judging by the abundance of technology, CELL also tried to destroy the wormhole, but nothing came of them. But the turrets can be hacked and brought back to life, they will help against small Cephs. Now you need to find a source of energy and recharge. Kill the Cephs, and then hit Alpha one more time. And most importantly, you need to jump down to the battery at the moment when Alpha turns into one big drill, otherwise the fight will end instantly. After the second call, the game will be saved. All that remains is to finish off the last batch of Cephs, and Alpha Ceph himself.
Once in the wormhole, the Prophet found himself in orbit around the planet, surrounded by scrap metal, where he observed the exit of a huge Ceph ship that emerged from the hypertunnel. The Prophet's prophecy has finally come true. But not completely. It's not the end of the world yet. He hacked into the Archangel satellite, after which he focused the beam on the vulnerable point of the ship. You need to hold the sight on this point until the charge circle is filled, and shoot. This is the end of the alien threat. The earth is saved, and Lawrence Barnes, better known as the Prophet, has fallen on a tropical island where no one will look for him. And if he does, well, he's pretty good at disguise now.
General information:
Achievement difficulty: 4/10
Offline: 37 (750 )
Online: 13 (250 )
Estimated time to get 1000: 10-20+ hours
Minimum number of passes : 1 (2 recommended)
Missable Achievements: “ Breakingthelore/ Gaining Knowledge” (collectibles), “ Suited- up/ Suit sits” and “ geared- up/ To the teeth”. (Other achievements can be revisited later using the Mission Selector.)
Do cheat codes affect achievements: No cheat codes.
Does difficulty affect achievements? Yes
Glitched Achievements: Yes(Super Soldier difficulty)
Unearned Achievements: No
Additional terms: No
Introduction:
crysis 3 - the next part of the series crysis in the genre of a futuristic first-person shooter. The achievements in the game are quite simple compared to the average shooter, and will not be too difficult for the average player. I recommend going through the game 2 times to get to know the game and make the second playthrough easier for yourself.
Single player game:
You need to complete the game on Super Soldier difficulty. It is up to you whether you want to start with it or learn the game first. Since the game can be completed in just 4 hours, I would recommend running it first on low difficulty to explore the locations, get all the collectibles and other achievements, and then move on to Super Soldier difficulty. If you decide to play on the “Super Soldier”, then be sure to complete the training, as the achievement is buggy. Follow the collectibles guide so you don't miss anything.
There are many achievements in the game that you would like to get during the passage, so I still recommend 2 playthroughs. You need to open all weapon modules, and get allupgrade all nanosuit modules to the maximum level by completing all the tests for each of them. Be aware of the achievements that are associated with the bow.
Multiplayer game:
There are many different multiplayer achievements in the game, and while they won't take you long and don't require a boost, some of them will require you to be skillful and/or lucky. It will take an average player about 6-8 hours to get rank 20 online. At this time, also focus on all other achievements. In the game, you can sometimes get into events that give a double increase in game experience. Thus, it will reduce the time to get a rank by half.
Conclusion:
The game and the achievements are quite simple and in total you will spend about 15 hours on them. Feel free to use the guide and achievement guide to find out how to get the achievements you missed out on.
| Staying Sharp | 20 | ||
|
Complete the tutorial. |
|||
|
Once you decide to start a campaign, you will be prompted to complete a tutorial. Agree and go through all 5 stages. As you pass, you will get an achievement. |
|||
| Welcome to the Jungle! / Welcome to the jungle! | 15 | ||
|
Complete the "Post Human" level. |
|||
| A Flawless Getaway | 15 | ||
|
Complete the "Welcome to the Jungle" level. |
|||
|
Story related, not to be missed. |
|||
| Off the Grid / From the stage | 15 | ||
|
Complete the "Root of Evil" level. |
|||
|
Story related, not to be missed. |
|||
| Turning the Tide | 15 | ||
|
Complete the level "Remove the safety lock". |
|||
|
Story related, not to be missed. |
|||
| Brink of Apocalypse / Threshold of the Apocalypse | 20 | ||
|
Complete the Scarlet Star Rising level. |
|||
|
Story related, not to be missed. |
|||
| Belly of the Beast | 20 | ||
|
Complete the "Just Human" level. |
|||
|
Story related, not to be missed. |
|||
| The True Measure of a Hero | 20 | ||
|
Complete the "Gods and Monsters" level. |
|||
|
Story related, not to be missed. |
|||
| Nanosuit Veteran | 25 | ||
|
Complete 3 of 7 levels on Veteran difficulty. |
|||
|
Cm. " professionalSuperhero”. |
|||
| Halfway to Hell | 25 | ||
|
Complete 3 of 7 levels on Super Soldier difficulty. |
|||
|
Cm. " professionalSuperhero/ Professional Superhero ”. |
|||
| World Saver / World Savior | 35 | ||
|
Complete the campaign on any difficulty. |
|||
|
Cm. " professionalSuperhero/ Professional Superhero ”. |
|||
| Bring it On / Give me an enemy | 45 | ||
|
Complete the campaign on Veteran difficulty. |
|||
|
Cm. " professionalSuperhero/ Professional Superhero ”. |
|||
| Professional Superhero / Professional Superhero | 65 | ||
|
Complete the campaign on Super Soldier difficulty. |
|||
|
The super soldier isn't all that difficult. It is recommended to leave this walkthrough for 2 times, as the first one will unlock all the upgrades that will make your life easier and you can focus on the other unfinished achievements. Either way, try to get around as many opponents as you can by using stealth and running whenever possible. Sometimes you will come across difficult places, so use the Nanosuit's abilities here wisely. About the glitch:As you know, this achievement is sometimes buggy. As soon as you start playing the Super Soldier, then go through the tutorial first. After defeating the big boss in the final mission, in front of the place with the ship, you must make a copy of the save to USB flash drive or in the cloud. Make sure you save the save file AND the file crysis 3 Content cache. Now load your save and replay this point until the achievement unlocks. If you've tried several times and still haven't received the achievement, try deleting the game from your hard drive. |
|||
| Perk Of The Job | 15 | ||
|
Solo: Save the Nanosuit Module. |
|||
|
At the start of Mission 2 , you will be directed to a location with a Nanosuit upgrade module hanging on the wall. Just take it and equip it in a special menu by clicking on. Then purchase one of the upgrades and assign it to one of the buttons. |
|||
| Geared-up / To the teeth | 25 | ||
|
Solo Play: Unlock all weapon attachments. |
|||
|
For this achievement, you need to collect all weapons with all possible weapon attachments. I would recommend picking up every weapon you can get your hands on (you can discard them right away if you don't need them) on your first playthrough. Remember that if you are about to exit the game, be sure to reach the checkpoint. Once you have collected all weapons with all possible weapon attachments, the achievement will unlock. Also remember that you can use the viser (clickto scan the enemy and see what weapon they are holding). You can watch the video guide. Below is a list of the rarest modules: Bayonet: Level “Unlock” – At the very beginning of the level, there will be many enemies. One of them carries a Marshall with a bayonet. Kill everyone and thoroughly search everyone. F.Y.7 1 M: Level “Just Human”- At a dead end, where there is an additional task. In it, you had to save your comrades from mines. Enlarged clip for Jackal: Scarlet Star Rising Level- Can be found on enemies inside the base towards the end of the game. |
|||
| Suited-up | 20 | ||
|
Solo Play: Upgrade all modules of the Nanosuit to the maximum level. |
|||
|
This achievement will take you some time. To open the nanosuit menu, you need to press the button. The first thing you should do is to unlock all possible modules with 16 Nanosuit Upgrade Kits and then purchase all the modules. Now you need to complete challenges to improve each module. Test tasks are listed next to each. When the condition is met, the module will be marked with a yellow star and you will receive a notification. From now on, you must switch to testing another module. To speed up the completion of tests, choose modules with similar tasks, and install them in all 4 slots. This way you can work on the challenges of all 4 at the same time. The achievement will unlock as soon as you unlock upgrades for all modules. |
|||
| Be a Pro, use a Bow! / Be a pro, use a bow! | 20 | ||
|
Solo Play: Kill 10 enemies with each type of arrow. |
|||
|
This is a cumulative achievement that you will most likely want to get as you play. Ammunition for the Predator bow is quite rare, so it may take several missions to complete this achievement. You need 10 people from all 4 types of arrows, that is, 40 opponents. Once you get 10 kills with 1 arrow type, a text message will pop up on the screen. Destroying helicopters does not count towards the achievement. |
|||
| Maximum Strength | 15 | ||
|
Solo Play: Kill 25 unarmed enemies using the Nanosuit's enhanced capabilities. |
|||
|
It's very simple. You need to be either in disguise or with protection turned on. Then approach the enemy from behind or in front. clampto grab it and push, To throw. Do this 25 times and you will get the achievement. |
|||
| 15 | |||
|
Solo: Pull 10 arrows from pinned enemies. |
|||
|
We use ordinary arrows and heavy tension. You need to kill the enemies standing near the walls so that you can pin them down. After pinning the enemy to the wall, approach and pressto pull the arrow out of his body. Do this 10 times and the achievement will unlock. |
|||
| The Gibson / Gibson | 15 | ||
|
Single Player: Complete 20 Hack Challenges. |
|||
|
This fairly simple achievement can be obtained during the campaign, and most players will get it by the end of the 3rd mission. To hack, turn on your visor () and press by hovering over the object to be hacked. Complete a small mini-game to unlock. You can hack sensors, mines and turrets. Do this 20 times and the achievement will unlock. |
|||
| I "ll Have That! / I'll take it | 15 | ||
|
Solo play: tear off and use all kinds of alien weapons. |
|||
|
There are five weapons that you will need to pick up during the campaign. All of them can be found in mission 7. List of weapons below:
|
|||
| Taste Of Your Own Medicine | 15 | ||
|
Solo: Kill 25 enemies while overcharged. |
|||
|
You will get this achievement while playing through and most likely in the last level of the game. Overcharge gives you full ammo pockets, restores health and increases attack damage. You are in overcharge mode when you see the energy bar turn blue and stay full. You can get supercharged from Ceph mind transporters, or by picking up small batteries (cores) that are sometimes scattered throughout the levels. |
|||
| Breaking the Lore / Gaining Knowledge | 10 | ||
|
Single Player: Collect all of the CELL intel. |
|||
|
You can find a guide to collectibles. |
|||
| Bang For The Buck / Bang For The Buck | 10 | ||
|
Solo: Kill a deer with explosive arrows. |
|||
|
This achievement is very easy to get in 2 missions -Welcome to the jungle. At the beginning of the level, you will go outside. Before that, equip explosive arrows and use disguise so as not to frighten off the deer. Aim at the deer, shoot, BOOM! The achievement will unlock. You can watch the video guide. If you did not have explosive arrows at that moment, then do not worry, as you will meet deer more than once (for example, in 3 missions). The main thing is to keep explosive arrows ready. You can also complete the game and then replay Mission 2. |
|||
| Can You Hear Me Now? / Can you hear me now? | 20 | ||
|
Welcome to the Jungle: Disable the Nanosuit block. |
|||
|
Towards the end of the second mission "Welcome to the Jungle", you will notice that your HUD and the Nanosuit will start glitching. From now on, you will receive an additional task "Disable Nanosuit Blocker", which is located almost in the center of the area with trains. There you will encounter enemies that you can either kill or ignore. The blocker looks like a small antenna with a screen. When you find it, go up and click . The achievement will unlock. |
|||
| Who Needs Rockets? / Why do we need rockets? | 20 | ||
|
Post-Human: Shoot down an attack helicopter with the Predator bow. |
|||
|
During the first post-human mission, you will split up with your partner. From now on, kill a few opponents and then you will be spotted. As soon as this happens, a helicopter will appear in the sky . Shoot a few burst arrows at the helicopter until it explodes. You can watch the video guide. |
|||
| White Rider / On a white horse | 20 | ||
|
Root of Evil: Circle down the river for 20 seconds. |
|||
|
During the third mission "The Root of Evil", you will reach a point where you will need to go down the river. Be careful and look for a large yellow/orange life buoy along the way. It's very hard to miss it. As soon as you see it, jump on it and let it go with the flow. Stay on it for 20 seconds and the achievement will unlock. The achievement is cumulative, so if you fall, then climb it again. You can watch the video guide. |
|||
| roadkill / accident | 20 | ||
|
Scarlet Star Rising: Run over 5 enemies with the rover. |
|||
|
During the fifth mission, Scarlet Star Rising, you will need to crush 5 opponents with the buggy. Kill progress is only saved when you reach a checkpoint, so if you die you will lose the kills you got after the last checkpoint. From the moment you find the first buggy, you should focus on firing on the helicopter, as it will be the one that will bother you the most. Next, we exit the buggy and put marks on the enemies that are at the top of the building in the center of the location. In total there you will have to move 4 opponents. Then change the buggy if yours is damaged and move on to the next checkpoint. Next, you will reach a place with a BIG gate that will block your path. To the left of the gate there will be a place with several soldiers CELL which you need to move to complete the achievement. If you didn't get the achievement here, then after passing the gate, you will meet a few more soldiers somewhere halfway to the last base. You can watch the video guide. |
|||
| Ping Pong! / Creek Pong | 20 | ||
|
Only Human: Kill all screamers. |
|||
|
During the sixth mission “Just Human”, you will meet 3 screamers (mechanical robots) that are patrolling around the Bravo air defenses. You must destroy them to get the achievement. If you're on a side mission where you need to rescue the mortar team, it will make things easier, as they'll be able to kill two of the three screamers for you. Once all three are destroyed, the achievement will unlock. |
|||
| Inside Job | 25 | ||
|
Solo: Kill 10 enemies with hacked turrets. |
|||
|
Every time you hack a turret, it will start shooting at enemies near it. Whenever you see a turret, I recommend hacking it. You will get this achievement after a few hacked turrets. |
|||
| Post-Human Warrior / Future Warrior | 25 | ||
|
Solo Play: Kill 10 enemies in a single overcharge period. |
|||
|
As far as I know, there is only 1 place where it is possible to get it. During the seventh mission “Gods and Monsters”, after interacting with all three Ceph Mind Transporters, you will be asked to go close the portal. You will be overcharged for quite some time and encounter around 12-14 enemies on your way to your next target. You need to act quickly while the overcharge is in effect. Kill 10 enemies on the way to the portal and the achievement will unlock. |
|||
| Arrow to the Knee! / Shot in the knee | 20 | ||
|
Single Player: End a CELL fighter's career by hitting him in the knee with an arrow! |
|||
|
This achievement may very well be one of the first you get after the tutorial. After getting the Predator bow, set low draw and regular arrows. This tactic will be in many places, but the easiest way to get it is in the first location after getting the bow. Once the door opens, sneak up on the enemy. Now point the bow at the knee. You do not need to aim accurately, but simply shoot quickly by clicking on. It is necessary to injure the enemy, not to kill him. Use trial and error, keep a good distance and don't draw too much attention. You can watch the video guide. |
|||
| Improviser / Improvisation | 15 | ||
|
Solo Play: Kill two enemies with one hit using the surroundings. |
|||
|
Easy to do during the first mission, after getting the Predator bow. As you get a bow, in the first location you will meet a lot of opponents standing nearby, as well as explosive tanks. The trick is to use disguise and find two enemies next to the tank. Then shoot him and kill both of them. You can watch the video guide. |
|||
| Nanosuit Ninja / Nanosuit Ninja | 15 | ||
|
Solo: Get 20 silent kills without being seen. |
|||
|
This achievement is pretty easy regardless of difficulty and can be easily obtained in the first mission or other stages of the game. Ideally, you want to look for enemies that stand alone and others do not see them. Use cover and disguise to sneak up on them from behind and kill them silently by clicking on. Perform a kill while in disguise, as immediately after the kill you return to disguise mode. If you were not noticed and the enemy did not start firing at you, then everything went well. The achievement is cumulative, so you can complete it throughout your journey through the world of the game. Use this method and you will get this achievement without any problems. |
|||
| Stick Around / Stay Here | 15 | ||
|
Solo Play: Using the Predator Bow, pin 10 enemies to walls. |
|||
|
Use the Predator Bow, preloaded with heavy draw and regular arrows. Find an enemy near any surface, shoot them in the chest and hope they stick to the surface. The best places to get this achievement are the beginning of Mission 4 and the later locations of Mission 1. Cm . “Hunter-Gatherer / Hunter-gatherer”. |
|||
| Clever Girl! / Good girl! | 15 | ||
|
Solo: Silently kill the Ceph Stalker. |
|||
|
You will first encounter a Ceph stalker in the second mission. From now on, turn on the disguise, jump down and run forward to the exit. If you turn around, you will notice that the stalker jumped onto the platform and headed the other way.If you turn around, you will notice that the stalker jumps on the ledge and starts heading the other way.Sneak up on him from behind and silently kill him by clicking on. If you fail, then let them kill themselves to reset the checkpoint in front of this room. You can watch the video guide. |
|||
| Poltergeist / Poltergeist | 10 | ||
|
Solo Play: Kill 10 enemies with throwables without being spotted. |
|||
|
This achievement is not that difficult even on the Super Soldier. This achievement is easy to get in missions 1 or 4, or in other stages of the game. You must use disguise and get close to the enemy close or behind. The main thing is that he was alone. Now pick up any item nearby by clicking on , and throw at it by clicking on. Enemies die instantly, no matter what the item is. If you drop an item while in disguise, then you return to it immediately after the death of the enemy, and get 1 point towards the achievement. It's okay if other enemies notice the death of a comrade, as long as they don't notice you and start shooting. Just keep hiding behind some cover. After restoring energy, we disguise ourselves again and kill other opponents in the same way. |
|||
| Rising Star / Rising Star | 15 | ||
|
Reach rank 20. |
|||
|
This is the only achievement related to rank in multiplayer. Fortunately, it is much easier to obtain than in crysis 2, since rank 20 is not that high. Try to spend a few hours in the game and enjoy it. For most players, getting to rank 20 is not difficult. |
|||
| Block Party / District party | 20 | ||
|
Complete one battle at each location in New York (public battles only). |
|||
|
To get this achievement, you need to complete one match on all 12 maps. You do not have to be in the match from the very beginning to count. You can check your progress with this achievement in the player profile. Between rounds, players vote for the next map, so don't forget to vote for the one you want. |
|||
| Odd Job | 25 | ||
|
Get two kills while throwing the same object in the same fight (public fights only). |
|||
|
Unfortunately, you won't be able to get this achievement with shields in Spear mode. To get the achievement, you will have to play a standard team fight. Any object is suitable for killing. Ideally, use a disguise, sneak up on the enemy and throw the item closest to him by clicking on. After killing one player items, you can take it again and kill another opponent with it. If you die, then after respawning, you can pick up that item again and use it. Be aware that this achievement is sometimes a little glitchy. |
|||
| Lord of the Pings | 15 | ||
|
Kill 25 enemies with the Screamer (Public Match only). |
|||
|
The Screamer is a large mechanical robot that appears on many maps. To get into it, you need to climb up, and then click on. At screamer has 3 attacks: cannon ( ), turret ( ) and stomp ( ). You need to kill 25 opponents using his attacks. Screamer can be found on the following maps:
|
|||
| The Specialist | 30 | ||
|
Get a Silent Kill, an Explosive Kill, and a Jump Kill in the same fight(only public fights). |
|||
|
Item Kill: Use items such as a pillar or shield. Jump Kill: Jump off the ledge and pin. Silent Kill: Sneak up from behind and use a melee attack (tap on). |
|||
| Bird of Prey | 15 | ||
|
Attack someone with a jump from 15 meters (Public Fights only). |
|||
|
You need to kill someone by jumping on him from a height. To do this, you need to jump from a high ledge and hold. This way you will be able to hit the ground and kill whoever is under you. This attack has a range, so it will kill anyone that gets there. It's best to find a high spot above the main area of the level and wait for the player with camouflage on. As soon as you see someone, then jump on him and do a jump kick. The easiest way to get this achievement is in the “Crash Site” mode, since the actions of the players here are predictable and most will capture the points. |
|||
| Going Commando / Commandos | 30 | ||
|
Get kills with primary, secondary, and explosive weapons in a single life (Public Matches only). |
|||
|
Battlefield players 3 are familiar with this achievement. As with many, it shouldn't pose much of a problem. You might want to get this achievement in Crash Site, but Team Deathmatch is fine too. Most likely, you will decide to start with your least favorite weapon, and end up with your favorite. When you respawn, then use the grenades in a crowded place. So you can kill someone, yes. Then sneak up on someone and kill with a spare weapon, preferably from behind. And finally, kill someone with the main weapon. |
|||
| Hit me baby one more time | 15 | ||
|
Fight someone in hand-to-hand combat with a torn off shield in Spears (Public Matches only). |
|||
|
Play Crash Site / Spears mode. While playing in Spear mode, you need to grab the shield. Each Spear ( A , B , C ) has 4 shields, which can be taken by clicking on, and use. Now you need to kill the enemy by hitting the enemy with the shield instead of throwing it at him. You can do this by clicking on. As for tactics, I recommend using disguise when moving, and hiding in safe places to restore energy. Try to find some camper or stay to protect the spear and wait for the enemy. Anyway, try to move slowly, and if possible, hit the enemy with a shield. |
|||
| Rudely Interrupted | 20 | ||
|
Pull an enemy player out of the Screamer (Public Match only). |
|||
|
The Screamer is a large mechanical robot that occasionally appears in multiplayer. To get the achievement, you need to get close to the screamer, jump on him and hold to kick out the enemy and take his place in the screamer. |
|||
| I See Cloaked People | 20 | ||
|
Kill 10 Hunters as a CELL (Public Match only). |
|||
|
This achievement can only be obtained in Hunter mode. As a fighter CELL , you must kill 10 hunters who are using disguise and are looking for you and your comrades. I would recommend finding some kind of dead end, sit there and keep a close eye on the entrance. Or Or use a thermal sight through which you can see opponents. |
|||
| Would you kindly... | 20 | ||
|
Accept and complete 25 unique challenges. |
|||
|
After each game, you will see a list of available challenges in 4 different categories. In any team game, you can complete up to 4 tasks, in a single game only 3. They are issued randomly and range from easy to very difficult. Choose the easiest for yourself, and try to complete at least one in each game. Remember that the time to complete them is limited, and they change. It's also worth noting that you can complete the same challenge multiple times and it will count. Note:Sometimes you will be offered challenges that you will not be able to complete with your level. You may be asked to use a weapon that unlocks at level 30 and you only have 15. Don't worry, just ignore it and sooner or later it will change to something else. |
|||
| Air Support / Air Support | 15 | ||
|
Kill 10 enemies with a standard VTOL weapon (Public Match only). |
|||
|
The VTOL is a ship that sometimes circles over the multiplayer map in modes such as Team Deathmatch and Crash Site. For this achievement, you need to board the VTOL and use the turret to kill 10 enemies. To get on board the VTOL, you need to jump into it when it is close to the ground. You will also have to be on board for a few seconds before you can use the turret. You can meet VTOL aircraft on the following maps:
|
|||
| Kicking off the training wheels | 10 | ||
|
Finish a fight with only manual armor mode (public fights only). |
|||
|
When you first start multiplayer, your armor automatically turns on every time you are hit by enemy bullets. After getting a few levels, you will be able to create custom classes. Notice the ability to auto-armor on anything else. Finish the fight without this ability and you will get the achievement. |
|||
Crysis 3 Walkthrough which you will find on our website, is the final part of the story of the Prophet - the commanders of the special squad of the Cell Corporation, which developed the famous nanosuits. You have to return to New York after 23 years since the last alien invasion, and believe me, a lot has changed there. But more on that later, but for now let's see how the passage of Crysis 3 begins.
As soon as you start the single player campaign, you will be prompted to go through the training mode. By the way, the world of training mode is very similar to the world of Tron. In general, there is nothing special there, but if you have never played any game from this series before, you can go through it. However, if you started a workout, but realized that you didn’t need it, you can easily exit it, doing it in the pause menu. Immediately after us, the campaign itself is waiting for us.
Our old friend Crazy with several comrades penetrates the aircraft carrier of the Cell corporation and frees the Prophet from the cryocapsule. Well, it's time to start.
Crysis 3 walkthrough: Mission 1
So here we are.
We go down and run after Psycho. Across the bridge, up the stairs, and now you are inside. There is a door in front of us and the Prophet tells us that we need to make everything without much noise. So, activate the weapon menu and put on a silencer.
The door opens and we see an unsuspecting cell fighter.
We turn on the disguise mode, sneak up from behind and use the melee button to kill the villain. Next, head to the door on the right and go down the stairs.
We will have a view of the whole room, keep to the left side and go down. Here we will see a few more soldiers, we will cut down the first one first:
And then turn around and destroy the second at the control panel.
Let's wait in the shelter, restore the energy and move on. There will be another patrol at the far end of the room on the upper level.
We covertly kill him and go forward towards the target marker. So here we are:
You can climb the stairs and kill another soldier, or you can use the ventilation and crawl through unnoticed. Also, the ventilation hatch was outside on the left side on the upper tier.
We approach the door, replenish the ammunition, if necessary, and open the door. We meet with Psycho and follow him. After some time, he will give us a bow (Fuck Yeah!), We go downstairs and open the door. We found ourselves outside again, in front of us was an open area and many soldiers of Cell.
Here you can act as you want: covertly or go ahead, the main thing is to destroy all the fighters so that Crazy can pass. Remember that arrows fired from a bow can be picked up, use this opportunity to keep ammunition with you. Once you've dealt with all of the Cell fighters, head up the stairs and follow Psycho. Soon you will reach a door that needs to be hacked remotely. Turn on the visor and hover over the green indicator.
Follow the Psycho and go outside again. There will also be an open area with many soldiers, just like last time, however, in addition to the soldiers, there will also be a combat helicopter that we need to shoot down. We take out the crossbow, go to the weapon settings and switch to explosive arrows.
We knock out the helicopter, kill the soldiers, move on. On the way to the Liberty Dome, you will pass through another large room, where you will need to kill everyone or slip through unnoticed. So, one way or another, you will reach the turret, which will not let you go further.
Turn on the visor and hack it. Follow Psycho. When you are prompted to take a set of modules for a costume, take them, go to the module settings panel and upgrade 4 traits with the number 1 in each column. Then put the upgraded traits on the row marked in orange to make up a set of skills.
Now it's time to go out into the urban jungle!
Crysis 3 walkthrough: Mission 2
Go outside and go towards the target marker.
When you reach the minefield, turn on the nanovisor to detect the location of the mines and hack their mechanism.
To do this, hover over the image of the skull.
Run towards the target marker and talk to the Psycho. Now we are in front of a large field, which is closely watched by a deadly rocket launcher, ready to turn into dust everything it finds.
Crazy will throw you the coordinates of things that will need to be destroyed using this setting. You run towards them and try to position yourself so that the installation's laser sights are close to your targets. Destroy several targets in this way, and then pick up the Ceph cannon.
Aim and destroy the three guns on the installation.
Along the way, you will have to pass through a small body of water, in which there will also be several Cell soldiers. Shoot the alien cannon at the water to fry several adversaries at once.
We go to the target marker and meet the Crazy at the hatch leading down.
Now you can turn around, go outside and immediately turn right. Then, when the opportunity presents itself, turn right again. There you will see a couple of Cell soldiers and a red box. Eliminate the enemies, open the crate and take a set of modules for the costume. Well, that's it, a bonus. Go back and jump down.
Follow Psycho through the tunnel until you split up, move forward and out into the open area. There will be several Cell soldiers and a turret here.
Reprogram it and it will take out most enemies. Finish off the survivors and go up the stairs.
Move towards the target marker and soon exit into an overgrown area. There will be two hunters here, deal with them and then move forward. Soon you will find yourself at a fork. Let's first go to the left and replenish the ammunition.
Then we go into the passage on the right and reprogram the traps.
We move forward, neutralize two more traps, and go out the door. Climb the stairs and exit into a large open area swarming with Cell soldiers. In stealth mode, jump down and look around, we need to get here.
You can get to this platform only by going to the end of the map and climbing the stairs. So let's start moving forward. After going about half way, look up, there will be a turret here.
Run to the target marker and use the zipline. Exit the door and run straight ahead until you reach the Psycho, killing the attacking hunters along the way. Take a place behind the grenade launcher and fight off the attack until the Crazy solves all the problems.
Follow your partner, push the wagon and climb on it. After a spectacular scene, the second mission will end.
Crysis 3 walkthrough: Mission 3
We follow the Crazy, we reach the elevator and jump down, go forward and exit to another open area, where there is a bunch of Cell soldiers.
Turn on invisibility and go around the building that you see in the previous screenshot on the right hand.
Hide behind cover, wait until the energy bar is replenished, enter stealth mode again and head towards the stairs. There will be a turret here that you will need to hack and deliver a lot of trouble to your enemies.
After the path is clear, go up the stairs and you will see a door with laser beams.
Take an item and throw it through the doorway. After that, a turret will appear at the other end of the corridor, reprogram it and go forward.
Enter the elevator and go upstairs. Upstairs they are already waiting for us! Activate the armor to avoid bullet damage when the soldiers fire on the elevator and climb into the hatch on the roof of the cabin. Climb into the ventilation on the left and go forward until you see an exit.
Open the hatch, kill the guards, for example with an explosive arrow or a grenade, and get out of the ventilation shaft.
Hack the container, take the buns and go outside.
Now we will need to hack two generators: south and north. Let's start from the south. Climb down the stairs and go forward, killing the soldiers of Cell along the way. Turn left at the first turn and head towards the building. Walk around to the right
And you will see the ventilation hatch below.
Climb into it, then go down the stairs and here it is, the generator. Before you break it to hell, turn on the visor, find an additional target in the form of an enemy air defense hack and execute it. The hack panel is right in front of the generator. After you destroy the generator, head to the ventilation shaft and get out of the building.
Here we will be expected by new enemies and a combat helicopter, but it does not pose a danger, since the hacked air defense system will quickly deal with it.
Now we head to the northern generator. However, to begin with, let's go to the end of the dam and climb the stairs. Here, breaking the lock, you can find ammunition and other goodies.
So, now we leave and go to the building with the generator. We go around it on the right and see another door, the protection of which must be cracked.
We go inside, go down, hack the generator, exit. Now we need to blow up the dam. We jump into the water, swim towards the target marker, set the explosives and watch an awesome scene.
Now we're in a flooded area. We go forward to the target marker, when you enter the cave, turn around here:
Here you can still observe deer with luminous footprints.
One of these deer will lead you straight to the Nanosuit Upgrade Kit. Hooray!
We go back and see a small cave straight ahead.
Let's get there and move forward. We pass to the waterfall and mark the targets.
We move forward and stop. Here at the top there will be a turret that will need to be neutralized.
We get down and turn left.
On the right side of the wall, you will see a passage lined with red metal.
Go through it, turn left, enter stealth mode and go up the stairs.
At the top, take cover, because a robot with a machine gun is patrolling here. One of the effective ways to eliminate it is to take a crossbow, choose an explosive tip and put it directly into a piece of iron.
Now we move to the elevator, but do not go into it yet, but turn right.
We pass to the blue building and take a set of improvements for the suit.
We go back and go into the elevator.
We get down and go along the left bridge all the way forward, and then to the right.
In front of us will be a crane control panel.
Interact with it, and the large bandura on the left will move to the side.
We interact with the remote control, go back, jump on a large metal hanging thing and do the same procedure again. Apparently, as a result of our actions, a defense mechanism is activated, and a mobile cannon will attack us from above.
It will need to be deactivated using the control panel nearby.
Now we move to the target marker and go into the elevator. Climb up and then up the spiral staircase.
We interact with the control panel, watch a spectacular scene, and this concludes the third mission.
Crysis 3 walkthrough: Mission 4
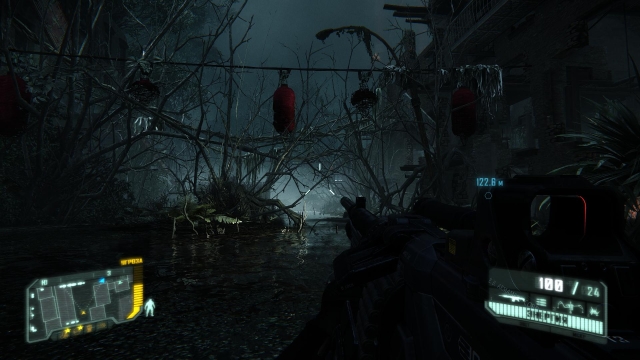
So, the night, the flooded area and the soldiers of Cell. Move diagonally towards the target marker.
Being about a hundred meters from the target, turn in the opposite direction and pay attention to the illuminated dilapidated building.
Jump up to the second floor and go through the doorway. Here you will find ammo and a set of upgrades for the Nanosuit.
We continue to go forward and jump up.
Walk forward in stealth mode and turn right, there will be a turret here, which is better to neutralize.
We go there and soon we will find ammunition. We jump down, so, here is our goal:
We go to the left side and turn right, there will be a door, and behind it a ladder up.
We rise and use the ziper. We pass through the building until we reach the other side.
There will be a lot of Cephs here, so if you don't want to make a lot of noise, it's best to use camouflage and head towards the target marker. Soon we will see the Ceph tower.
After it, we move forward, and on the left after the first passed building, 150 meters from the target, there will be a box with a grenade launcher, which will be very useful to us soon.
We approach the door, the dying soldiers of Cell will run out of it, as well as a new, hitherto unseen type of cef, which the grenade launcher will help us defeat. Next, we go into the doorway and move towards the target marker, now let the huge centipede in the middle of the field serve as our guide.
This is Krikun. It can and even needs to be intercepted using a visor and a standard hacking algorithm.
There are also flamethrowers roaming the area, like the one we killed recently. They can also be hacked if you like, although the screamer will deal with them, at least part of them, after reprogramming. Further we move to the left of the screamer and we see a small rise.
We rise, we pass into the passage on the right, and then into the door behind it.
We pass a few more doors until we are here:
We jump down and enter the disguise mode, there will be a lot of Cephs here, as well as flying drones, so it's better not to join the battle. Walking forward a little, retreat to the ruins on the right.
Take a breath, restore energy and go forward again. Move towards the target marker and go around the building on the right side. Soon you will see the control panel.
Interact with him to lower the ladder and go inside.
Follow the target marker, but do not approach the Crazy.
Go around the platform on the other side and you will find a set of modifications for the suit.
Now just follow Psycho, watch the cutscene and the mission will end.
Crysis 3 walkthrough: Mission 5
We move to the target marker and stop on a hillock.
We jump down and enter the disguise mode, there will be several cefs, if your fists itch, you can kill them. Next, we head to the electrified structure.
We activate the alien control panel and watch the cut-scene. After it, we will have to fight with several ordinary cefs and one big one. It is most effective to run around the “fatty” and shoot him in the back, preferably with a bazooka, if any, but explosive arrowheads will do. Ordinary weapons can also kill him, but it will take longer.
Then immediately to the left.
Soon you will find yourself on a small hill, and in front of us in a small pond, Cell soldiers will fight with the Cephs.
You can take advantage of the fact that water is everywhere, take a bow, choose electric tips and kill several targets at once.
However, you can just pass by. As we jump, we go forward to the end of the area, then turn left and again find ourselves on a hill.
We jump down, go to the ruined house and go in the door.
We go up the stairs, go through a series of doors and go outside again.
Ammo can be found behind the first APC.
Behind the second is a set of costume upgrades.
We continue to move towards the target marker. When you reach the burning canvas
look to the right, there you will see more ammunition and a vehicle that can be used.
Get behind the wheel and drive to the target marker.
When you pass over the destroyed bridge, the first bus will have a Cell soldier with an RPG, so eliminate him before he eliminates you. We won’t be able to drive further, so we get out of the car and walk.
There will be a few more soldiers here, deal with them. Enter the passage and go down the stairs until a cut-scene plays.
So, let's go outside.
We jump down the ledges, note that on the first left you can find a box with buns.
We go down and get into the car.
We drive towards the target marker. On the way we will be met by a hostile helicopter.
Deal with him using the rocket launchers installed on the car. A little ahead there will be soldiers with RPGs and a turret, which it would be desirable to reprogram.
Near the building on which the turret was installed, there is another car (in case the old one is no longer able to drive), as well as ammunition. We are moving forward, soon an armored personnel carrier will appear before us.
Take an RPG (or C4) and blow it up. We continue to move. Soon we will be in an open area.
There will be a large cef here, as well as some Cell soldiers and a turret. Turn on invisibility and run to the platform on the left. Here you can find cartridges, a real gift for those in need. Now let's go up the stairs
and interact with the switch.
The gate below will open, we sit in the car and drive through them. There will be another armored personnel carrier here, you know what to do with it, after that we move forward again. We drive into the tunnel, drive to the end and go out into the open area.
We pass forward and turn on the visor to detect all targets. Let's complete the side mission and destroy the defenses of the command center.
Turn left and go towards the target marker. There will be a big cef here, let's not get involved in a fight with him, but just go further in stealth mode to the installation that needs to be destroyed.
There will be a turret in front of her, so be careful. When you hack the turret, the installation will need to be blown up with an RPG or C4. Then we turn left from the installation (standing towards it) and go forward. Attention, there will be a minefield nearby, so clear the mines just in case.
There will also be several flamethrowers and a large titan, you can fight with them, or you can go straight to the switch by the gate and activate it.
We go inside, wet the soldiers of Cell and turn right.
We go up the stairs, disarm the cannon, it kills the soldiers, we go straight, turn left, disable another turret, and approach the bridge, which rises and does not allow us to go further. Standing directly in front of the bridge, turn around 180º and you will see the control panel of the bridge on a small hill.
The deed is done, the bridge has lowered, we go along it and go into the elevator.
We watch the cut-scene. The fifth mission ends here.
Crysis 3 walkthrough: Mission 6
At first, everything is quite simple, we go to the target marker, kill a couple of cephs and turn off the air defense.
We will have two more objectives, but let's turn on the visor and complete a couple of side missions. First, let's find the downed VTOL and free the trapped soldiers.
Supplies can also be found in the back of the plane. Now let's help the valiant fighters on the BMP and defuse the mines, because of which they cannot move.
Defuse the mines with the help of a familiar mechanism and get into the BMP for the machine gun.
Destroy the first screamer on the way, get off the armored vehicles and get into the car nearby.
Before you go, use the visor, because the whole map is a minefield. Let's first drive to the left to complete the side task, which is to free the mortar squad.
This is necessary in order to easily destroy the screamers, of which there are many. Just turn on the visor and mark the target, and the mortars will sort it out further. Now we go to the nearest main goal.
We climb up.
Here we enter the stealth mode and reprogram the enemy gun.
After we screw up the installation of the cefs, we go back and use the zipline.
We go (run or ride) to the last target marker. Don't forget to use the visor to detect minefields. When you get closer to your destination, you will see an enemy turret. Hack it.
After destroying the last Ceph tower, go to the Psycho ship and climb into the compartment. Now you will need to shoot down all enemy ships. Once you've dealt with them all, Psycho will land on the building nearby, get behind the grenade launcher and hold off the waves of Cephs. After that, a fight with a large four-armed alien awaits us. Just shoot at his surroundings (flying metal fragments), after which he will pull you towards him, and you will need to quickly press the hot key that appears on the screen. Do this procedure several times and the enemy submits. Go through the opening and the mission will end.
Crysis 3 walkthrough: Mission 7
We are in a cave.
Just go ahead, you can't get lost here. Sooner or later you will come to the metal core of the cave.
We go around the rock on the metal platform to the right
and we climb up.
We pass through the cave forward and before the exit we turn into the tunnel on the right.
We pass forward and soon we will see a turret on the left, which we will crack.
The turret will clear the way for us, after which we need to run to the source of the power of the Cephs, which is indicated by the target marker. Now we need to find a couple more of the same. We go towards the target marker and climb up the stones.
We pass a little forward, turn on the visor and mark an additional target.
We go to the marker of an additional goal, this will also allow us not to get lost. We go to the remaining sources of power, killing crowds of Cephs along the way. After the last source, we climb up and meet him - Alpha Ceph!
Pick up alien guns, shoot him, dodge his attacks. Especially you need to strain when he curls up into a drill and starts to drill everything around. Soon his weak points will appear - orange areas, on which it will be necessary to focus the fire. After you hit one of these areas and Alpha Ceph pulls you in, quickly press the hotkey to counterattack. After that, he will retreat and you will need to fight with more reinforced Ceph soldiers. Since Alpha Ceph has only 3 weak areas, you will have to do a similar procedure three times. That's it, Alpha Ceph is defeated!
In recent years, there have not been many really resonant interesting games. Many modern projects are a typical “stamping” that no longer evokes any emotions. Quite another matter - "Crisis 3"! Passing it, despite the strict linearity, really captivates. However, judge for yourself!
Let's take a step back right now. Yes, Crysis often does not allow for a wide exploration of the territory, but this is not the game "Dino Crisis 3", the passage of which is based on such research! Our task is to get as much adrenaline as possible in exciting fights!
30th Gate, New York
A certain armed team, led by a colorful Crazy, frees the Prophet. Actually, for him you will play. By the way, only the Prophet had a suit left. From the rest of the team, such a useful piece of equipment was requisitioned by CELL. We get a gun, we rise after our partner to the second floor, after which we wind a silencer on our weapon. What else will "Crisis 3" offer us? The passage should continue in the same silent mode.
As soon as the door opens, you need to turn on the camouflage mode and carefully go to the left. Before we see the enemy, whom we silently eliminate. After that, you need to go down, go straight and to the right, after which we will have a ventilation shaft in front of us. We get out along it, open the door at the other end of the passage and let in Psycho. Go down with him. We continue the passage of the game "Crisis 3".
Obtaining a bow
We get our main weapon, that is, the bow. He has a wide range of arrows, each type is suitable for a specific task. We go to an even lower level, open the next door on the list. We carefully destroy the enemy that is to the right of us, and then we will finish off the person at the control panel. We go to the next location. There is a locked door, the opening of which was made in Be careful, because any mistake reduces the stock of time!
In general, the complete passage of "Crisis 3" (despite the criticism caused by its linearity) can often make you want to play the game again, since in many places there are "crossroads" where you can make decisions that directly affect the ending.
And again we have to go down. At this time, Crazy, justifying his nickname, comes into a bad mood, as he really lacks the taken away suit. Then we have to choose which enemies to deal with in the first place: on the upper or lower level. After that, we go to a new entrance, and this time, in the same way as described above, we break the control panel located on the left. If you do not quite understand the hacking algorithm, we advise you to view the passage of "Crisis 3" with Karn, where this moment is separately and in detail signed.

We pass through two large locations, which are protected by automatic turrets: they can also be hacked, so they should not cause you much trouble. In general, "Crisis 3", the passage of which is described in the article, offers players many similar mini-quests. Over time, you get used to them and start to decide “on the machine”.
By the way, this is the best way to do it, because after your intervention they will mow down the CELL fighters. Again we go out to Psycho and finally go upstairs. We see that a real jungle has appeared under the protective dome, formed due to the active use of alien technologies.
Pennsylvania Station, New York
There is a niche in the wall with an upgrade kit: we pick it up and improve our costume. After we got out, we reach the minefield. Turning on the visor, we neutralize those mines over which the red skull "flies". Together with Psycho, we break the door and quickly go upstairs. The psycho stays and marks the targets. You jump off and take turns visiting all the places that were marked by a partner.
Since the territory is guarded by watchtowers, you need to use disguise as often as possible and constantly use all available shelters. If you are still noticed, you will have to “make legs” as soon as possible. At that moment, it is extremely necessary to immediately activate the armor, otherwise you will receive a huge damage to the health of the hero. Having reached the farthest point of the park, we finally find a killer alien sniper rifle, with which we can easily deal with all the watchtowers.
By the way, "Crisis 3", the passage of which we describe, offers players much less weapons than it was in the previous two parts. In principle, it is much easier for stealth fans here, since you can use only one bow. The rest of the categories of gamers will have to get used to the idea that cartridges in these parts are a rather scarce thing. Of course, this is more about high levels of complexity, but still.
Thus ends the first stage of "Crisis 3". The walkthrough (part 1, of course) was easy enough, but it will be much more difficult further on, so get ready for hot battles!
Way forward

After that, you can completely neutralize the minefield and go towards the lake. It is better to use electric arrows: if you shoot one at a time when there are several enemies in the water at once, then you will probably be able to “put” several of them at once.
We get to the freeway, under it we find Psycho. Important! Before you jump off the road, you must definitely activate the armor. We go through the sewers, open the door in the technical passage ... and hear the voices of the enemies that are waiting for us ahead.
We turn left and stomp around, leaving enemies with a nose. And again, you will come across a sentry turret, which is best hacked. We move to the other side of the location, we get on the railway tracks. In general, the passage of "Crisis 3" is unlikely to give you many problems in terms of where to go: as we said, the game is very linear, it goes "on knurled".
Neutralization of enemies
To get to your partner, you need to accelerate and hold down the jump button. You need to jump over the obstacle and get to the door, while Psycho will take the upper path. Here we are in for an unpleasant surprise in the form of stalkers who lurk in the grass. To counter them, you have to activate your armor. Again we go into the sewers.
In front of the traps there is a small opening to the right: turn into it if you want to properly replenish your spent stock of arrows. Again we go to the turrets, according to the old memory, we will reprogram them. After that, you can safely break the door and go upstairs. What else has prepared for us the passage of "Crisis 3"?
Nothing good awaits there: there are a lot of enemies throughout the territory, and a combat turret is installed in the center. It is best to carefully walk along the left side and one by one to destroy the adversaries from the bow. Don't get carried away: you need to constantly use cover, because otherwise you will instantly perish under the fire of the turret. Having passed to the other side of the location, we go up, find the stairs and go down. Outside, stalkers are in full swing, and some bastard interferes and makes it impossible to track the state of the suit.
A small plot digression: if you are a fan of the game, and you are interested in a really interesting "Crisis 3", the passage in Russian is not for you. Unfortunately, the translation does not fully reveal the characters' characters and the twists and turns of the plot, so connoisseurs are advised to familiarize themselves with the English version (if language skills allow, of course).

Take a closer look: somewhere in the distance, a red light is flashing, which is the source of interference. We go to him, simultaneously fighting off enemies with all our might. It is best to go from above, along the roofs of the wagons. There is a barrel not far from the malicious blocker: we shoot at it, it explodes and destroys the device. Note that the passage of the game "Crisis 3", despite the linearity of the latter, rarely offers such "pianos in the bushes": as a rule, to destroy something, you still need an explosive charge.
After that, we follow to the cliff, where we finally see the Psycho. Hiding behind a stationary device, we carefully destroy the enemies approaching you. After a couple of minutes, their flow weakens and you can follow the Crazy. Since the gates are closed, you have to stomp along the rails, getting to the tank. We push it and comfortably rush through the tunnel. You can shoot enemies, but it is not necessary.
Nassau Street, Financial District, New York
We reach the shelter, where we meet with Claire, as well as with Rush. We go down, follow the Crazy and together with him we jump higher. We crouch down through the rubble. So we get to the elevator, the door of which must be opened by a partner. First you have to jump into the first cabin, from it - into the second, only after which you will finally get down. Just in time: CELL employees are landing with might and main from the helicopter. We carefully approach the dam from the left flank, after which we get inside through the main entrance.
Sabotage in generator rooms
Since there are lasers on all the thresholds, it is imperative to turn on the masking mode before going inside. We open the elevator door, slowly go upstairs. The elevator stops. You need to wait a bit, and then get out through a small hatch. Having got out into the corridor along the ventilation shaft, destroy the enemies in the location.
Hacking another control panel, we pass further along the dam, keeping the path to the generator. We go to the right, not forgetting to break another control panel before that. After that, you can go down, simultaneously destroying the enemy fighters. Having brought down the generator, we jump into the water and go to the southern generator. You can’t go on top, because at this time an enemy helicopter flies there. We go and go until we see which will lead you straight to the generator. Again we commit an act of vandalism and quickly go upstairs.
Again we go along the ventilation shaft, we reach the marked place, we install a good explosive charge there and leave the dam.
Path in the swamp
The area above is flooded, but that shouldn't stop you on your way to the rally point. You will meet opponents, but there will be relatively few of them. Having reached the island, first of all we track down and destroy the sniper, because otherwise he can greatly complicate our life. Go to a narrow passage: the stream of water rushing through it will lead you to the desired goal in any case. We carefully sneak up to the complex, and then go around it on the left side. Then you need to jump into the ubiquitous sewer system in order to get inside the complex through it.

Do not forget that in these parts, mines are scattered in all corners, which must be cleared. Using the lift, we rise to the upper level, and there we again look for a way down. Having gone down, we adjust a couple of terminals and restore them in the system.
Important! To get to the second of them, you have to jump on the blocks. Immediately after that, an automatic turret will rise, and therefore we quickly activate the armor and rush in the direction of the central lift. Having climbed up, we eliminate all enemies and turn off the Nexus.
Thus ends the passage of "Crisis 3", part 2. It's time for new achievements!
Delancey Street, Chinatown, New York
While the enemy fighters are calmly (and one by one) pacing the streets, you can carefully shoot them with a bow. Behind this exciting activity, we are caught by the news about the launch of a certain “Scarlet Star Rising”. At this moment, we notice that three enemies have separated from the main enemy group. We hit the most nimble with a carbon arrow, and kill the two remaining ones by launching an electric shot into the water along which they walk. We move to the next zone on the left side of the street, simultaneously destroying all the enemies that come across on the way.
Here we are met by a whole bunch of mines. Having neutralized them, we climb into the annex and go upstairs. We find a passage to another building. Then you need to climb up the stairs, find the door, break it down and get out. Here, for the first time in the entire game, we will meet Ceph foot soldiers. After you destroy them, you need to go to the building from which the angry arsonist breaks out. Finally, you will meet with a worthy opponent, whom the passage of the game "Crisis 3" offers to defeat. Part of the way was pretty easy, but from now on you will have to work hard!
New discoveries
Attention! It is necessary to seize the moments and fire exclusively on its red part, which is hidden under strong armor most of the time. To disable it for a few seconds, you can hack the Pyro.
Having finished with him, we get out through the building to the other side of the street, where you can find a whole bunch of the same arsonists. You don't need to fight with them. Cross to the right side of the street and move towards the laboratory, where they are taking off the suits. Be sure to hack the flyers along the way, otherwise they will raise the alarm as soon as you are discovered. Arriving at the laboratory, lower the bridge at the elevator. Here you will once again meet with Psycho.
We go down the elevator and follow the ubiquitous partner. We are looking for the latest update for the costume and finally unlock it. Along the way, we find out that it was Claire who participated in the removal of the ill-fated costume from Psycho. As you can see, there are interesting plot twists in Crisis 3 as well. Walkthrough (part 3) will give us answers to all the remaining questions!
Pearl Street, Two Bridges, New York

So, we will soon learn that the very "Star Rising" is nothing more than the planned destruction of New York. We go out to the roof of the building, through the red pipes we make our way further. Near the "transportation of the brain" we destroy all the Cephs we meet. We find a hologram, for a few seconds we appear before the enemies in the form of Alpha Ceph, after which they lag behind us. Unfortunately, the real Boss appears after only a couple of seconds, after which they pounce on you with redoubled energy.
While you're behind cover, be sure to pick up alien weapons! The fact is that at this time the energy supply of your suit stops depleting for some time.
Helping Claire
Going forward, we encounter numerous Cephs and CELL fighters. Having fought off some of them, we hasten to help Claire.
Go outside and jump down, after activating the armor of the suit. Try to shoot enemy transports and lone fighters from a long distance without wasting the energy of the suit. While doing these exciting things, you won’t even notice how you get to the Archangel’s command center. Of course, you have to break the gate and get inside.
First, you should get close to the control circuit and neutralize the combat turrets. Then we find explosives at the location and destroy all the equipment. What else is preparing for us the passage of "Crisis 3"? The final is near, and therefore we are waiting for even more exciting and dangerous tasks!
We go to the control room. Since the enemies managed to raise the bridge, you need to climb higher again and activate the control panel. We go further and meet with the right team, which should help us prevent the cataclysm. We are almost done with Crisis 3 (walkthrough). Alpha Cepha is the only boss left in your path. It's time to destroy him too!
Under Columbus Square, New York
Going a little further, you will find yourself in a closed space. We'll have to pick up the only gun and go forward. There we fall into the water, but we have to climb even lower. We get into the cave and continue to go straight. It is better to mark enemies in advance, so it will be much easier to destroy them. Then we neutralize and break open the combat turret, which is located on the right side. Immediately after this, numerous Cephs appear, so a friendly turret will come in handy.
On the left side (slightly higher from the floor) there is a passage. We jump there and go deeper into the cave. Having got out from the other side, we jump down. Again we meet the turret and we are engaged in its "domestication". Having approached the transport system of the brain of the Cephs, we find mines and reprogram them.
Don't forget to pick up a powerful alien weapon: after all, we have almost finished the passage of the game "Crisis 3"! The final promises to be hot, and therefore additional weapons will not hurt. Again we move along the left side, getting to the last point of transportation of the brains of the Cephs. We get to the wormhole and finally close it.
Last fight

Getting ready for the final battle with the Alpha Ceph. It is important to fire at the head, hiding in time behind massive shelters during return fire. As soon as Cef tries to pull you towards him, we quickly and often click on the button whose name appears on the monitor. In periods of calm, we move back and destroy the approaching enemies.
Be sure to look for red capsules, as they help you become invulnerable to enemy attacks for a short time! Again and again we repeat the cycle until we wait for the capitulation of the Alpha Ceph.