
How to make a bird feeder with your own hands: original and unusual ideas. Bird feeders - do-it-yourself options from ordinary materials (55 photos)
Housekeeping requires a lot of trouble and time investment. One of the main concerns that takes up the time of farmers is feeding chickens. The products that the market offers, although convenient to use, are not cheap. Do-it-yourself automatic chicken feeder is a salvation for those who count their money. In this article, we will consider what ways to quickly feed chickens are offered by factories and craftsmen.
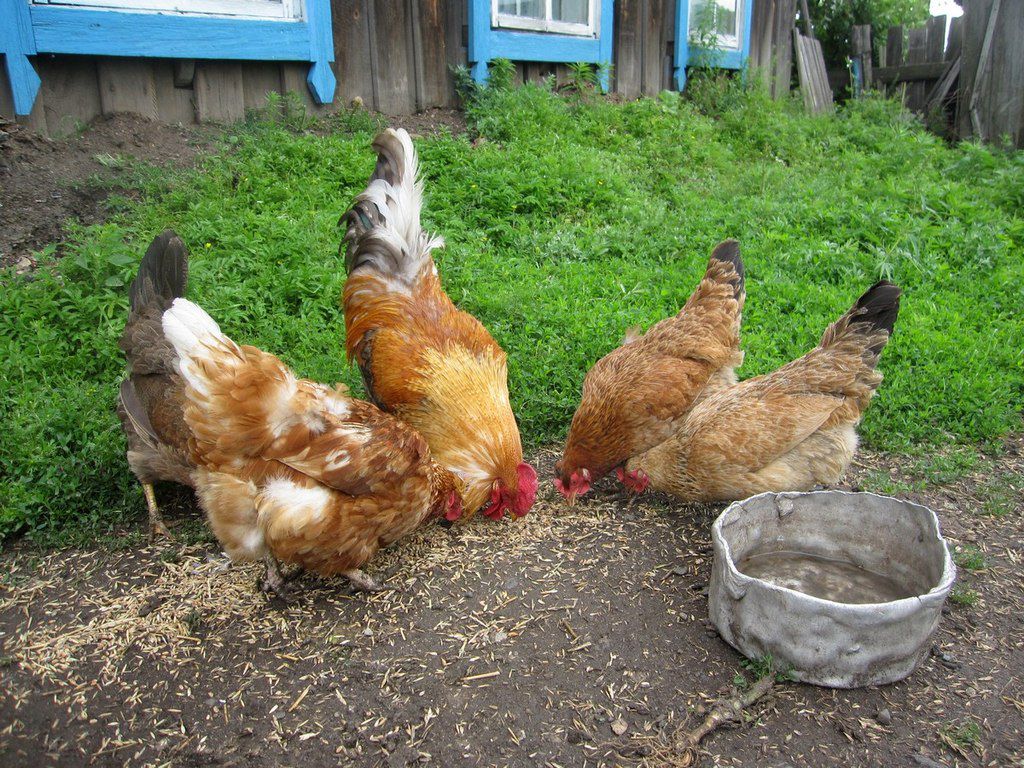
Feeding chickens is an important part of the poultry industry
All feeders, homemade or factory-made, feed the chickens as the birds eat them. The farmer needs to pour the feed into a special compartment, from where it is fed in portions to the feeding tank. The compartment closes tightly, which ensures the safety of the feed: chickens will not eat it ahead of time, and especially violent ones, for example, will not scatter feed around the chicken coop.
With an automatic feeder, the farmer does not need to monitor the feeding time of the chickens and visit the chicken coop with feed, depending on the diet of the chicken flock. Therefore, if you are planning to have several bird individuals, this issue must be thought out in advance.
Automatic feeders are designed for dry food. Since chickens need a varied diet, consider having other mixing containers in the coop.

What automatic feeders does the market offer?
In stores, you can purchase both the simplest designs, for example, a bunker, and high-tech devices with a timer and a feed scatter function. The price of the former fluctuates around 500-1500 rubles, but for technical progress you will have to pay 5-6 times more. The body material of such feeders can be different: from ABS plastic (the price is about 6.5 thousand rubles) and to powder-coated steel (8.5 thousand rubles).
Also, store feeders can be conditionally divided into ready-made structures with a feed container and a tray, and separate trays with dividers, for which you will need to additionally find some kind of jar or bottle. If we talk about simple products of the second type, then they are very cheap, around 100 rubles, but they have a small volume and are only suitable for feeding chickens. If you keep a flock of adult chickens, such a purchase will not be successful.


Expensive automatic feeders require the installation of barrels or bottles with a capacity of around 20 liters. The device is mounted at the bottom of the barrel, it does not need to be connected to the network - it works on several D-type batteries or is powered by a battery. The whole structure must be fixed at some distance from the ground in order to ensure free scattering of grain.
The advantage of such an automatic feeder is the presence of a timer and the ability to pre-program the amount of feed to be scattered. This allows you not to worry about whether the birds are eating well enough. But the chickens will not eat more than they should.
However, it is advisable to purchase such devices only if there is a large farmstead. If there are few chickens, then it is better to pay attention to simpler and cheaper products.

The principle of operation of the bunker (vacuum) automatic feeder
Perhaps this is the most popular option to feed a flock of hungry birds. Almost all the products described in the article involve the use of this particular principle.
The bunker feeder, as mentioned above, consists of a closed container, which is completely filled with food, and a tray into which food is supplied through a small hole. You can not be afraid that the chicken will climb inside the feeder - the hole is too narrow, and the food itself will interfere.
Before you start making a feeder in one of the following ways, consider how best to secure the container with the daily ration so that the hens do not knock it over and scatter the grain around the coop. At the same time, you must definitely have the opportunity to remove it, since the feeder must be regularly cleaned from the remnants of the old feed.
The bunker feeder is very easy to make yourself from improvised means. Let's consider several ways.
Before you begin any of the following instructions, please read them carefully to the end so that the feeder you have made will fully meet the needs of your birds and chicken coop.
Plastic hopper feeders
Making a vacuum feeder from a plastic bucket
This type of container is not suitable for outdoor placement. Moisture will get into the feed, which will negatively affect its qualities. But if you plan to feed the birds in a chicken coop, then this option may be very useful for you.

In order to make a vacuum feeder, you will need:
- a plastic bucket with a tight lid of the required volume (5-10 liters);
- tray - you can buy it in a store with dividers, or you can use some kind of basin, tray or other flat container. The diameter of the tray should be 20-30 centimeters greater than the diameter of the bottom of the bucket;
- plastic cutter or any other handy tool;
- screws and nuts.
| Step | Photo | Description |
|---|---|---|
| 1 |  | Take a bucket and make several semicircular holes at the bottom with a radius of about 4-5 centimeters. Choose the size and number of holes based on the required amount of feed intake. If you are using a tray with separators, the number of separators will match the number of separators. |
| 2 |  | Use the screws to connect the bucket to the container for the tray. |
| 3 |  | Fill the bucket with food and close the lid. |
So that the birds do not get hurt, it is desirable to process the edges of the holes, or to prevent burrs when cutting.
So that the food does not remain at the bottom and is available to the birds, something cone-shaped can be fixed inside the bucket - for example, the top of a plastic bottle. The feed will flow down the sloping walls to the edges of the tray, which will make it easier for the chickens to access it.
In a similar way, you can make a vacuum feeder from plastic bottles, metal buckets and other containers. A plastic bottle can be attached to the tray with wire, and dividers can also be made from it.

Small hopper feeder for chickens

Chicks need a special approach to feeding. Firstly, at first they are kept separately from adults, and secondly, the growth of chickens may not allow them to reach the feed. Therefore, separate containers are made to feed the chickens.
Tools and materials
- Two plastic bottles with a volume of 1.5-3 liters or another, depending on the amount of feed being poured. Choose bottles so that the top and neck of one bottle fit freely in the middle of another.
- Feed tray. To do this, you can use lids, plastic bowls and other flat dishes with not very high walls, otherwise the chickens will not reach the feed.
- A utility knife or other tool for cutting plastic.
| Step | Description |
|---|---|
| 1 | Take the smaller bottle and cut off the top cone. We no longer need the bottom of the bottle. |
| 2 | Take a large bottle and cut off the top cone and bottom. |
| 3 | In the bottom of the large bottle, make small holes with a diameter of about two centimeters. |
| 4 | Attach the middle part of the large perforated bottle to the feed tray. |
| 5 | Close the top cone of the small bottle and place it inside the resulting feeder. This is necessary so that the food does not get stuck at the bottom of the bottle. |
Instead of a larger bottle, you can use a small plastic bucket, such as mayonnaise, or a container for storing CDs. The procedure for such a feeder is almost the same as described above.


Automatic feeder from plastic bottles
If you often buy water in 5 liter plastic bottles, you can use them to improve your chicken feeding process. However, this design has the same drawback as plastic bucket products - they are not weatherproof.

For the feeder you will need:
- two plastic bottles;
- a stationery knife or other handy tool for cutting plastic;
- a flat bowl or basin slightly larger in diameter than the bottom of the bottles for the lid.
| Step | Description |
|---|---|
| 1 | Take the first bottle and cut it in half. We will need half with a bottom, the upper part with a cone will not come in handy. When cutting, be guided by the photo. |
| 2 | Cut holes on all sides so that the chicken head can freely crawl through them. Remember to finish the edges of the holes so that the chickens do not get hurt. |
| 3 | Take the second bottle and cut off the bottom from it. |
| 4 | Place the second bottle upside down in the first. Connect both parts of the feeder in a convenient way. |
| 5 | After filling the feed, close the bottom of the top bottle tightly with a wide bowl or basin. Pay attention to how easy it is to remove the cap from the bottle so that the chickens do not get to the feed. |
The neck of the top bottle should be a few millimeters below the bottom edge of the holes. If this condition is not met, the food will spill out.
Video - Bunker feeder for chickens in 10 minutes
In a similar way, you can make a bottle feeder for chickens. An example of such a product is in the video below.
Automatic feeders made of wood or plywood
Designs from plastic bottles, no doubt, spoil appearance chicken coop. Although this factor does not of great importance in poultry farming, since the main thing is the satiety of chickens, you can pay attention to plywood products. Another obvious advantage of such feeders is that you can design their capacity yourself, which is not so easy to do with the products described above.
On the other hand, working with wood panels and plywood requires a lot of labor and not everyone can do it. But if you have necessary skills in carpentry, then the following two options may be useful to you.
Autofeeder Option One: Without Pedal
Tools and materials for creating a feeder
- Thick plywood or wooden boards.
- Drill and drills.
- Screwdriver and screws.
- Loops.
- Sandpaper.
- Saw.
- Pencil or marker.
- Paper for creating a drawing.
- Roulette or rulers.
Step Description 1 Before we start work, we need to make patterns, according to which we will cut out the details for the feeder. Take paper and draw the following details:
For the side walls - two figures 40 cm high, with an upper edge of 26 cm and a lower edge of 29 cm. Do not forget to cut two triangles on the walls (see drawing);
For the front part - two rectangles 28x29 cm and 7x29 cm;
For the lid - a rectangle 26x29 cm;
For the bottom - a rectangle measuring 29x17 mm;
For the back wall - 41x29 cm.2 Transfer the drawings to the boards and carefully cut out the details. 3 Now you need to make holes for the screws in the attachment points with an electric drill. 4 To make the surface of the feeder safe for birds, sand all the details. 5 Based on the above drawing, assemble the structure. Do not forget that the front top and back walls should be located at an angle of 15˚ relative to the horizontal. 6 Hinge the top cover onto the back of the side walls. 7 Treat the resulting box with an antiseptic. It is undesirable to use varnishes and paints, this can adversely affect the feed and health of chickens. Auto feeder option two: with pedal
The principle of operation of the feeder can be seen in the video below. The chicken steps on the pedal, the lid of the tray opens and access to the feed appears. This design is convenient because, unlike the previous version, it is completely sealed, and if the tree is treated with a waterproof solution that is safe for chickens, it can be installed in the yard.
An automatic feeder with a pedal is an interesting and unusual option.
The principle of operation of such a feeder can be seen in the video below.
In order to design your own pedal chicken feed container, you will need:
- wooden boards or sheets of dense plywood;
- thin wooden bars;
- furniture bolts or other products for fastening elements;
- loops;
- electric drill and drills;
- sandpaper;
- saw;
- pencil or marker;
- paper for creating patterns;
- roulette.
Step 1. Draw patterns for ten details of the future feeder: a lid for the tray, two side panels, a detail for the bottom, a back wall (note that it is tilted in the finished box), two rectangles for the front wall (or three, depending on which box you like more), top cover, pedal. When determining the dimensions, be guided by your needs and the drawing from the previous version of the feeder.
Step 2 wooden bars cut into six pieces. The two bars to which the pedal will subsequently be attached should be the longest (the length of the bar is calculated based on the width of the pedal and the width of the box). Two more pieces of timber - medium length (needed for a lid over the tray). The third pair of short bars serves to interconnect the lifting mechanism.
Step 3 Using a saw, cut out pieces of plywood according to the patterns. Treat them with sandpaper to neutralize the product for chickens.
Step 4 Connect all the walls of the feeder together with screws. Please note that the back panel should be at an angle of approximately 15˚. This is necessary so that the feed does not stagnate in the far corner of the box. To provide greater density, use the clamp.
Step 5 Attach the top cover. To do this, use 2 loops. Subsequently, you will discard this lid to fill the feeder.
Step 6 Next in line is the most ingenious part of the product - the assembly of the pedal and bars. To understand how to act, be guided by the photo above. Attach medium length bars on the sides to the lid of the food tray. At the opposite end of the bars, you need to make 2 holes. The diameter of one of them should be slightly larger than the diameter of the bolt, and the hole itself should be located closer to the end of the bar. This hole should correspond to the same in the side wall of the box. Then we screw the bolt so that it allows the bar to move in the plane of the wall.
Step 7 In the same way, we attach the longest bar to the pedal of the automatic feeder. The hole for connecting the bar to the wall must be made approximately 1/5 of the length of the bar. Don't forget the hole at the very end of the bar.
Step 8 We still have two free holes on each side (one on the top and bottom bar). It is necessary to fasten the shortest pieces of bars to them. Unlike the previous steps, this connection must be rigid and strong or the pedal will not work. Make sure that when you press it, the lid of the feed tray rises. If this does not happen, adjust the tension of the bolts.
Step 9 Treat the box with an antiseptic. As in the previous case, it is undesirable to use varnishes and paints in order to avoid harm to chickens.
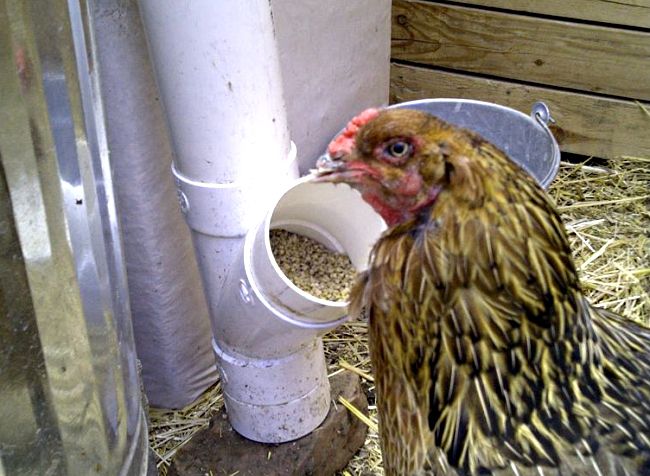
Feeding through pipes
A number of poultry farmers claim that PVC pipe feeders are the most convenient to use. Firstly, the pipes must be fixed on the walls of the chicken coop, so you can not be afraid that the birds will knock over the container and all their food will be on the floor. Secondly, among the home-made automatic feeders, the pipe design has the largest volume - it includes about 10 kilograms of feed.
Of the minuses of such structures, it is worth noting that the pipe cannot just be taken and washed with running water under a tap, so if you settled on this option, you will have to invent your own cleaning methods.
Automatic PVC pipe feeder with tee
You will need the following materials:
- three pieces of PVC pipes with a diameter of 110 mm and a length of 70 cm, 20 cm and 10 cm;
- two plugs of the corresponding diameter;
- a tee of the appropriate diameter, the angle of which is 45˚;
- brackets or other material for attaching the pipe to the wall.
Step Description 1 Attach a cap to one end of the 20 cm pipe. This will be the bottom of the feeder. 2 Attach a tee to the other end of the pipe so that the side elbow looks up relative to the bottom. 3 Attach a piece of pipe 10 cm long to the side knee. Do not forget to process the edges of the pipe so that the chickens do not get hurt - this is where they will receive food. 4 Connect the remaining 70 cm pipe to the third hole of the tee. 5 Attach the pipe in the chicken coop in any convenient way, for example, on brackets for attaching ventilation pipes. After filling the feed into the pipe, it must be closed with a plug so that precipitation does not get there. The disadvantage of such a feeder is that the feed will remain at the bottom, and it will have to be raked out manually.
Automatic pipe feeder with knees
This design is perhaps the most practical. It is easy to assemble and install and is relatively inexpensive - all materials for it will cost around 1,500 rubles. If you have recently installed ventilation in the house and you have one and a half meter pieces of pipe left, then this option will be the most budgetary for you.
Necessary materials for the feeder
- A piece of pipe with a diameter of 110 mm and a length of 1.5 meters.
- Two knees - one at 45˚ and the second at 90˚.
- Brackets or other material for attaching the pipe to the wall.
- Stub.
Step 1. Assemble the structure in the following sequence: pipe, then 45˚ elbow and 90˚ elbow. Make sure that the edges of the last knee do not have burrs and are not traumatic for birds.
Step 2 Attach the structure to the wall in the way that is most convenient for you.
Step 3 Use a jar to fill the feed inside the pipe and, if necessary, cover with a plug.
Video - Automatic pipe feeder in a private household
Automatic feeder options for advanced poultry farmers
Of course, not everyone succeeds in being satisfied with plastic bottles and pipes. Therefore, in skillful hands everything is used - from meat grinders to self assembly mechanisms.
Video - Automatic feeder for chickens from a meat grinder
Video - Automatic feeder for chickens using a relay


Hello, dear visitors and regular users of the site "Visiting Samodelkin". Today I want to tell you about one more of my homemade products and post a detailed photo report on its manufacture. Since in addition to rabbit breeding in my subsidiary farm there is also a large number of chickens, then the question of the optimal feeding regimen, as well as the method of preserving food, was very acute for me.
The fact is that the chicken is constantly rowing something, looking for and so on. Therefore, the food that I poured into ordinary feeders, namely wooden trays, half tires from cars and the like, they either raked or trampled down. And with a herd of about 70 hens, feed losses are quite high.
Wooden feeders are still not convenient for me, whatever one may say, but the material is short-lived. Yes, and it is constantly on the street. Of course, you can buy a feeder, but they are all small, and if they are made to order, then the price will be simply sky-high. Therefore, rummaging through the Internet, I found for myself just such an option, which suited me perfectly. I downloaded the picture and based on it I made a pattern of the side part. The remaining parts are not needed, because. there is nothing complicated about them, these are ordinary galvanized strips of the size you need. For work, I needed such tools and materials. A sheet of galvanized steel, riveting, riveting tools, a drill, a drill with a diameter of 4 mm, a hammer (preferably a wooden mallet), a grinder with a petal disc for grinding, metal scissors, a tape measure, a felt-tip pen for marking and a welded mesh, the cell of which is 3x6 cm.
Initially, I prepared a pattern. Did the selection method, that is. Cut it out and see if it fits or not. Since the weather was windy, so as not to blow out the edge, I put a load on it. But this does not interfere, everything is clearly visible in the photo and you can easily make yourself the same.

I trace around the contour with a felt-tip pen and cut it out. But it's worth hurrying up. If you don’t cut it out within 7-10 minutes, the contour on the metal will blur and you won’t get the exact dimensions. You need 2 of these parts.

After that, we bend the edges of the blanks as shown in the photo.


Then I cut out the day pan of the feeder. Its length is 96 cm, and 2 cm for bends along the edges. I calculated its width in this way - I added the length of the lower part of the sidewall and two adjacent to it, plus 2 cm for the bends. Marked and began to bend.


Now you need to fix the pallet to the details of the side walls. I drilled holes of 4 mm, and fastened with the help of a riveter and rivets. The riveting diameter is 3.8 mm. The fasteners are strong enough.


The next step, I cut out 2 strips of metal, which will be attached to the inside of the feeder and will be the front walls of the feeder, its bunker part. Here I just cut off exactly 96 cm, since the bends are not needed on them, they will be attached to the side walls on which they already exist.
The lower part of these parts falls below the upper side. This is so that the food that you will pour into the feeder does not wake up over the edges. And the bird will not be able to throw it out. The main thing is not to lower it too low, otherwise it will be difficult for the birds to get it out of the feeder.


The main work is done. Since my feeder is large enough, according to my estimates, a bag and a half of feed will enter it, then you need to strengthen its bunker walls. This is necessary so that the grain in it does not burst the walls, which will lead to deformation of the entire structure. To do this, I cut out strips from the same galvanized steel and bent them at the edges at an angle of 90 degrees, in the form of the letter P. I riveted them into the interior of the bunker.


I installed the same strips on the top of the feeder.


also cut out the corners and installed them at the corners of the structure. Both for strength and for a more "presentation"

It's time to set up the net. To do this, I cut small strips of galvanized steel, which I pre-drilled at one end. Having marked the location of the grid on the feeder, I made holes and riveted these blanks there. They play the role of loops when raising the net. You can also fix it rigidly so that the mesh cannot rise, but then, if the feeder is dirty, it will be very inconvenient to clean it.


Now let's prepare the mesh. Since she has a cell width of 3x6, and this is not enough for the chicken's head to crawl into the grate, I removed the jumpers and the cell width doubled. I grinded off the protruding bitten off remains of the lattice so that the bird could not get hurt. I install it on improvised loops, bend them over and cut them to right size. On the sides, I also make clamps from the strips so that the mesh is firmly fixed and cannot open.


Since this feeder will stand outside most of the time, it is necessary to make a cover for it so that rain does not get into the feed. To do this, I took the mounting angles and attached them to the edges of the metal strip that should become the cover. As usual, I fasten everything with rivets.


I'm making a pen. Zamorachivatsya does not make sense and therefore it is from the same material as the entire feeder. I just bend the metal as shown in the photo and attach it to the lid. At the same time, I also make the same handles, only of a smaller size, for the sides, in order to make it easier to carry the structure.


The advantage of this feeder is that you will no longer depend on whether the chickens have grain or not. Falling asleep once every few days, depending on how many heads of birds you have, you can calmly go about your business and not think about going to feed the farm. As the grain pecks, thanks to the bunker device, the feeding compartment will be constantly replenished with feed until it runs out in the bunker. Production time is about 4.5 hours. This is completely from the development of the drawing to the last riveting. Then I got the hang of doing it in 2-2.5 hours. The cost of such a feeder is about 800 rubles, while for a similar price on the Internet you can buy a feeder for 15 liters. The benefits are obvious. So do it. I wish you all success!!
Are you planning to raise chickens and have already built a chicken coop for them? Then it's time to take care of the rest - in particular, the feeder. It is easy to make, especially since you can use various materials. Consider the simplest and most common options for how to make a chicken feeder with your own hands.

A feeder can be made from anything - for example, from boards, boxes, pipes or plastic bottles. But regardless of the material chosen, one problem always appears - we are talking about mixing feed. And if you use several feeders at once, they will take up too much space. There is a way out of this situation, but we will talk about it a little later.

So, in order for the feeder to cope with its functions, it is necessary to prepare for its construction in advance. First, determine the size of the structure and choose a place for it. At the same time, it does not matter whether it will be located in the chicken coop or in the yard - all birds should have free access to it. Moreover, chickens should not crowd or interfere with each other during feeding.

It should also be remembered that chickens need not only dry, but also wet food (we are talking about mixers). In the first case, cylinder-shaped bunkers are excellent, in which the volume of feed is replenished automatically. For wet food, a feeder in the form of a trough is more suitable, on top of which a “turntable” made of timber is installed.


Making a chicken feeder - an overview of popular methods
Of course, the procedure for constructing a trough differs from a bunker-type feeder both in terms of labor costs and the complexity of the work. But modern equipment and materials greatly simplify the process, so there will be no particular difficulties.
Note! When constructing a feeder, one must adhere to one important rule: the design should be stable, food should not spill out of it. Otherwise, there will be not only an overrun of feed, but also a violation of sanitary standards.
Option one. creative cutting board feeder

To make such an unusual bird feeder, you must prepare:
- cutting board;
- funnel;
- a small plastic cup;
- rubber hose (transparent);
- electric drill.
The further algorithm of actions should look something like this.
Table. Making a cutting board feeder
| Steps, no. | Photo | Description |
|---|---|---|
| Step 1 |  | Take a funnel (preferably plastic) and circle its outer contours on the board. Try to do everything as accurately as possible. |
| Step 2 |  | Drill a lot of holes within the drawn circle. It is important not to overdo it here, because the supply of dry food should be limited. |
| Step 3 |  | Take a pre-prepared transparent hose of the required diameter. Connect the hose to the end of the funnel, if necessary, you can use additional fasteners (for example, a clamp). |
| Step 4 |  | Take a plastic cup and make a hole at the bottom as shown in the image. The diameter of the hole should be such that the end of the hose fits snugly and holds well. |
| Step 5 | Take the other end of the hose and place it in the hole you made. In case of insufficient density, treat the edges of the hole and the outer surface of the hose with a sealant. | |
| Step 6 |  | Next, you need to glue the socket of the funnel to the cutting board. To do this, process the contour of the circle with holes with sealant. |
| Step 7 |  | Put a funnel on the circle, hold it in this position until the sealant dries. |
| Step 8 |  | Connect one end of the hose to the cup and the other end to the glued funnel. The funnel should be at the bottom of the board. |
When assembled, the feeder described above will look like this. You can add grain.
Note! The grain will be poured through the hose from the watering can into the cup itself. Also make sure the board is stable, as chickens are more likely to sit on it.
Option two. Bunker feeder from a plastic bucket
This design can be considered automatic, since your participation in feeding the chickens will be minimal. Such a feeder can be purchased ready-made in the store, but it will not be cheap, so you can try to make it yourself. The manufacturing procedure is quite simple.

Of the consumables you will need:
- special sectional bowl for animals;
- plastic bucket.
Once prepared, follow the instructions below.
Step 1. Take a plastic bucket and make holes in its bottom through which the food will spill out (as shown in the image below).

Step 2 Attach the sectional bowl to the bottom of the bucket using screws.

Step 3 Fill a plastic bucket with grain or any other food, close the lid.

The advantage of this design is that it can be installed in almost any convenient place (put or hang). As the food is consumed, it will automatically pour into the bowl under the influence of its own weight.


Option three. Plastic bottle design
Nowadays, water is often stored in cheap plastic containers. Such bottles are, perhaps, in every home and they can be used to build a convenient feeder.

Step 1. Cut the bottle in half, make holes on the walls in the bottom half, as shown in the image. The size of each hole should be sufficient so that the chicken head freely enters it (it is advisable to leave a small margin).
Step 2 Take the second bottle, cut the bottom in it, then place it upside down inside the prepared incision. As a result, a few centimeters should remain between the neck and the bottom.

Step 3 Pour the grain inside, close the hole in the upper part with something. The disadvantage of this design is that in case of bad weather it must be transferred to the room, however, for placement inside the house, this is the best option.
For chickens, you can make a similar design in smaller sizes using ordinary plastic bottles. Manufacturing technology will be the same.

Option four. Simple wooden feeder (#1)
If you don’t have a lot of chickens, and only pieces of wood from improvised materials, then you can make the feeder described below. The latter is great for those cases when the owners do not have the opportunity to periodically add grain (in other words, this is also a bunker feeder). It is not difficult to make such a design, the main thing is to clearly follow the instructions below.
First, prepare the following consumables and equipment:
- pieces of strong thick plywood or wood;
- electric drill, a set of drills;
- a pair of loops;
- sandpaper;
- saw;
- screwdriver;
- pencil;
- roulette.
After that, proceed directly to manufacturing.

Step 1. Start by creating a drawing, then transfer it to the tree, drawing the elements of the required dimensions:
- bottom 29x17 centimeters;
- two "sidewalls" 40 centimeters high with an upper edge of 24 and a lower edge of 29 centimeters;
- two rectangles for the front wall - 28x29 and 70x29 centimeters;
- top cover (26x29 centimeters);
- back wall (40x29 centimeters).
Step 2 Carefully cut out all the elements.
Step 3 Make holes for the screws in the required places using an electric drill.
Step 4 Sand all surfaces to be smooth and bird-safe.
Step 5 Using screws, assemble all the elements into a single structure. To achieve maximum density, you can use a clamp. It is also important that the back and front walls are attached at a 15° angle.

Step 6 Use the hinges to attach the cover to the back of the side walls.
Step 7. It is also advisable to treat the feeder with an antiseptic. No paint or varnish can be used.

Note! The finished design will turn out to be roomy and comfortable, the food, protected from moisture, will be gradually fed automatically. In addition to labor costs, no other shortcomings have been noticed.
Option five. Simple wooden feeder (#2)

Another simple option is a feeder made in the form of a small trough. It is suitable for those who have a large number of chickens and have a canopy in case of rain.
For work you will need:
- thick boards or plywood;
- hammer;
- screws (you can use nails instead);
- saw;
- pencil;
- paper;
- ruler.

Step 1. First, make a drawing of the future design. Extremely accurately determine all the elements, their dimensions and installation locations of fasteners. This is the most important step to avoid possible errors and inconsistencies.
- bottom (15x100 centimeters);
- a pair of side walls (8x100 centimeters);
- one beam (HxWxD - 2x3x100 centimeters);
- small end walls with a width of 15 centimeters and a height corresponding to the long side + bottom thickness.
Sawing the end walls is the most difficult step. For a better idea, we advise you to familiarize yourself with the image below.
Step 3 In accordance with the drawn up drawing, cut out each of the elements.
Note! The bottom should be thick and heavy enough so that the birds do not overturn the structure. The height of the walls should be comfortable for chickens.
Step 4 Connect all the elements together. Try not to leave gaps, because food can spill out through them. Additional processing of wood is not required, moreover, if desired, this design can be modified to suit your own needs.
The advantages of such a feeder include durability and strength, as well as versatility with regards to the type of feed used (the latter can be both dry and wet). As for the shortcomings, there is only one - the feeder needs minimal maintenance.


Option six. Two-story wooden feeder

The next option is intended primarily for dry food (although you can use a variety of mixers). Ideal for small spaces, because the second tier compensates for the lack of free space. For work, you will need screws and bars.
Step 1. First, prepare all the elements of the feeder. The main one will be the lower tier, the height of which should be 25, and the width - 26 centimeters. As for the length, it depends on the number of birds.
Step 2 Make special grooves into which the damper will be inserted.
Step 3 The second floor will be a small trough with a board height of 10 centimeters. Install the second floor on the ends of the first, then attach with hinges.
Option seven. PVC pipe construction
An easy-to-implement option that requires minimal cost and effort. PVC pipes are sold everywhere and are inexpensive. To make, use one of the methods below.
Method one. With cutouts

For the construction of this structure, take care of the following consumables:
- a pair of PVC pipes (40 and 60 centimeters in length);
- two plugs;
- connecting knee.
A 60 cm pipe will be installed horizontally and will serve to feed the pizzas. Another pipe is installed vertically and is necessary for the supply of grain. Start by making a hole in a longer pipe, although it is not uncommon to make one large one instead, through which the birds will peck at the grain.
Step 1. On a 60 cm pipe, draw holes with a diameter of 7 cm and with the same pitch.
Step 2 Cut out the marked holes.


Step 3 Put a cap on one end of the pipe.
Step 4 Install a knee on the second end, and, in turn, thread another pipe into it.
Step 5 Fix the resulting structure in the house, preferably in two or three places at once, so that it holds well.

After each falling asleep of grain, put a second plug on top so that debris does not get inside. The described design is also a bunker, so you can add food only once or twice a day.

Method two. With tee

In this case, for manufacturing you will need:
- PVC pipes, sized (70, 20 and 10 centimeters);
- two plugs;
- tee with 45° angle.
Step 1. Take a 20 cm pipe and put a plug on one end. This will be the bottom of the feeder.
Step 2. Put a tee on the other end of this pipe so that the side elbow is directed upwards.

Step 3. Insert a small pipe into the side hole.
Step 4 Insert the pipe of the longest length into the third hole of the tee. Here, as in the previous method, after each feed filling, the pipe must be closed with a plug.

There are other ways to make a PVC pipe bird feeder, as experienced poultry farmers talk about in the video below.
Video - Feeder made of pipe
Option eight. Canister construction
A cheap and easy way to make a feeder.

Prepare for work:
- any plastic canister;
- a piece of pipe 10-15 centimeters in length;
- fasteners;
Step 1. Thoroughly clean and dry the canister.
Step 2. Using a knife or any other tool, cut about 5 holes on the sides. The diameter of the holes should be about 6-7 centimeters so that the head of the chickens fits freely in them.
Step 3. Make a hole in the upper part for filling the grain and attach a pipe on top (the diameters must match). That way the birds won't get in.
To protect against rain and debris, you can additionally take care of a cover for the pipe.
Option nine. CD case construction
Don't throw away your old CD case - you can still use it to feed your chickens!

In order to build such a structure, prepare:
- long container;
- a large bowl;
Step 1. Clean and dry the container, then cut three or four 2x2 cm holes on its walls near the rim.
Step 2. Fill the container with food, cover with a bowl on top.
Step 3 Turn the container with the bowl over and place it in the required place.
Note! Make sure that there are no sharp corners, about which chickens can get hurt.
Also note that this design is not durable and is designed for a small number of birds.
Option ten. Automatic design
The video below shows another interesting option - a structure that opens under the weight of a chicken.
Video - Automatic feeder
This is not a complete list of possible options - the article describes only the most popular of them. Having shown ingenuity and imagination, you can come up with your own design, the main thing is that the product is durable and safe for feathered pets.

Nowadays, sometimes there is no time to do certain things, and having household going somewhere else is harder. If you are raising chickens, then an automatic feeder will be just a salvation for you. It can be made by hand. Materials for this can be used different. How to do this, read further in our article.
A new automatic chicken feeder in the store can cost quite a lot, and making it yourself from different materials is much easier. Feeding will take place automatically, without requiring your direct presence. Loose feed will come in as the hens peck the previous portion.
It will be great if our instructions help make your life easier. One way or another, people make repairs, buy new furniture, and the old remains. After all this, everyone probably has different materials. With their help, you can make something worthwhile with your own hands.
Materials we will need
- plywood sheets;
- wooden thin bars;
- bolts from furniture;
- loops;
- saw;
- electric drill.
Step-by-step instruction
- Let's start by drawing the details on the plywood: a feed lid, 2 side walls, a bottom, a back wall that is mounted at an angle, three front bars, a top cover, a wide pedal.
- From the boards you need to make 6 narrow crossbars. Two should be long, designed for the pedal, two shorter, for the cover over the feed tray and the last two are the shortest, to fasten this whole mechanism.
- Cut out all the details with your own hands with a saw and fasten together with screws. As a basis, you can take the feeder as in the photo above, but your imagination is absolutely unlimited.
- Make the back panel at an angle to the inside of the structure by approximately 15 degrees.
- For easy attachment of the lid to the top of the feeder, take the loops so that you can always open it and empty the feed.
- Medium length bars need to be screwed to the lid for the aft compartment.
- The longest wooden blocks are twisted according to the same principle as mentioned above. This will be the bird pedal.
- We connect the long and middle bars with the smallest one and attach the entire structure to the main bunker with bolts. The driving mechanism bolts should not be tightened forever. These bars must move.
- Check with your own hands that when you press the pedal, the feed tray opens. In which case, adjust all fasteners.
Such a pressing mechanism will protect the food from foreign birds that are not accustomed to the tray.
Features of a plastic bucket feeder
Oddly enough, but the most useful and amazing inventions are very simple. This is exactly what a plastic bucket feeder can be considered as. You will be surprised how ingeniously everything can be done with your own hands.
Necessary materials
- a plastic bucket or basin, but preferably with a handle and good capacity;
- a menage bowl for feeding pets or for plant seedlings;
- building materials, such as a sharp knife or small file;
- screws, self-tapping screws or construction adhesive.
Step-by-step instruction
- Choosing by size lower part future design, do not forget that it should be significantly larger in diameter than the upper part.
- First we take a bucket and on the fold of the walls and bottom, we cut out small round or oval holes with our own hands. Through these holes, feed under its own pressure will flow directly to the hens, so the size of the cutouts must be optimal for the supply of cereals.
- We fasten the menage plate to the bottom of the bucket or basin using self-tapping screws or screws. If this good is not there, you can glue all the components to each other.
- Pay close attention to where the food will fall out of the holes, that is, each hole corresponds to a recess on the pallet. This should be done to prevent high grain consumption and provide some savings.
- Pour the grain into the bucket and close the lid.
- It is better to hang the finished auto-feeder low above the ground, for convenient use of the bird and the likelihood of getting inside the vessel is minimal.
- Grains need to be poured so much that it is enough for the time when you will not be. You can be sure that the bird will be full.
Designed only for feeding with dry feed, which are characterized by flowability. It is possible to pour grain, granules, compound feed into the container, but in no case can you add various mixers or grated vegetables.
These devices can be various kinds, but they are based on the same principle of operation.
Thanks to the operation of the feeders, chickens are fed automatically, exactly in the volume that was consumed by the birds. Another part of it is contained in an individual compartment of the mechanism.
The advantage of the automatic feeder is not only in the continuous supply of birds with food, but also in its protection from scattering and soaking during the rainy season. Also, these devices save feed well, due to the correct dosing.
Attention is drawn to the automatic feeder, which can be programmed, as well as having a timer. With the help of the timer it is possible to set the feeding time. The feeder has an auger that moves the feed into the tray. Almost all models of devices with a timer have a backup battery and a container for storing feed mix. The frequency of feeding is possible up to eight times, the break between them is also adjustable.
The feed compartment is perfectly protected, due to the tightly closed lid. Due to the fact that the tray is removable, it is very easy to clean. The main disadvantage of this device will be a very high price.
Options for sale
In specialized stores and online stores, it is possible to buy both simple devices, for example, a bunker, and high-tech devices with a timer and a feed spreading function.
The cost of simple ones varies from five hundred to one and a half thousand rubles, while the latter will cost five to six times more.
The material of these devices is different: from ABS plastic (cost about six and a half thousand rubles) and to powder-coated steel (eight and a half thousand rubles).
Where to begin?
You can actually make an automatic feeder with your own hands from a wide variety of materials. Most often they use wood, plywood or plastic.
 In order to independently make an auto-feeder, the following materials and tools are needed:
- plywood sheet;
- wooden bars;
- bolts for furniture;
- loops - 2 pcs.;
- saw for wood;
- drill, drill;
- pencil;
- roulette.
A To make your own, you need the following materials and tools:
- a plastic container (volume from five to ten liters), while a bucket, bottle or other type of container can perform the function of a bunker (read about how to make a chicken feeder yourself from a plastic 5 liter bottle);
- well-sharpened knife;
- a plane with a side;
- nails;
- self-tapping screws;
- wire.
How to do it yourself?
With dispenser
When all the materials are prepared, then you can start manufacturing. The procedure is as follows:
- On a sheet of plywood, it is necessary to draw the details of the structure. There should be seven of them:
- front part - two rectangles 28 * 29 centimeters and 7 * 29 centimeters;
- cover - rectangle 26 * 29 centimeters;
- side walls - two pieces, height 40 centimeters, upper edge 26 centimeters and lower edge 29 centimeters;
- bottom - rectangle 29 * 17 centimeters;
- back wall - 41 * 29 centimeters.
- Carefully cut out the details.
- Next, make holes for the screws in the attachment points with an electric drill.
- In order to make the surface of the feeder safe for chickens, process all the details with sandpaper.
- Assemble the structure. It must be remembered that the front upper and rear walls should be located relative to the horizontal at an angle of 15 degrees.
- Hinge the top cover to the back of the side walls.
We watch a video on how to make a do-it-yourself plywood automatic feeder for chickens:
Bunker model
- At the beginning, you need to choose a container into which the feed mixture will be added, as well as the bottom.
- As a tray, it is possible to use a lid that has edges or any container for growing seedlings.
It is necessary that the bottom diameter be bigger size by 20-30 centimeters, in contrast to the feed bunker.
- Next, you need to cut a semicircular hole, with a radius of about 4-5 centimeters, for each compartment, using a knife.
- Then, using self-tapping screws, connect both parts of the parts.
- In order for the feeder to have correct location on required level and to ensure maximum convenience for the birds, nails and long wire should be used. When total absence the need for this and the bird feeder turned out to be quite strong and stable, it is enough to put it in the chicken coop on the floor.
Photo


How to use?
All these devices, made independently or purchased in stores, are designed to supply food to birds when they completely eat it.
The poultry breeder is obliged all the time to add food for his winged pets to a place specially designated for this, that is, to the compartment in which food is added in portions. This place must be tightly closed - this will keep all the food from being quickly eaten by all birds, especially violent, for example, Andalusian breeds of chickens, and will prevent the food from being scattered all over the chicken coop.
So that the bird rushes and does not get fat, then you should not overfeed it too often. In order for the bird not to get sick and always be in excellent condition, it is necessary to observe its proper diet. To date There is a wide variety of pet foods available..
The meat will be juicy and soft, and the eggs will be healthy and rich in trace elements, if the bird receives the right and healthy diet. It is very important to comply proper nutrition in birds. Although you need to feed the bird all the time, there are still situations when you need to limit the dose of food in chickens. Most often, the need for such a procedure arises when eggs are formed in chickens.
Young chickens should not be allowed to lay eggs, as these birds can have serious health problems. If chickens have problems with bones or their structure, then this indicates that its nutrition is of poor quality or monotonous.
Conclusion
Automatic has been very popular and loved among all poultry farmers for a long time. It is better not to use overly expensive production models in small economic enterprises, since they can be quite ineffective.
You should not be upset prematurely. You can always make your own at home automatic feeder for your birds and this is done quite simply. In creating it yourself, there are two pluses: you can make it to your taste, color and spend a minimum of money on it.